Wavetables
Plinky and Plinky+ allow you to replace the wavetable in the positive range (0 - 100%) of the Shape parameter.
Install wavetab.uf2 in Tunnel-of-Lights Mode - instructions below.
NOTE: Replacing the wavetable will alter the sound of your Synth presets.
To revert to the default wavetable, install Wavetable 01 Original by Miunau.
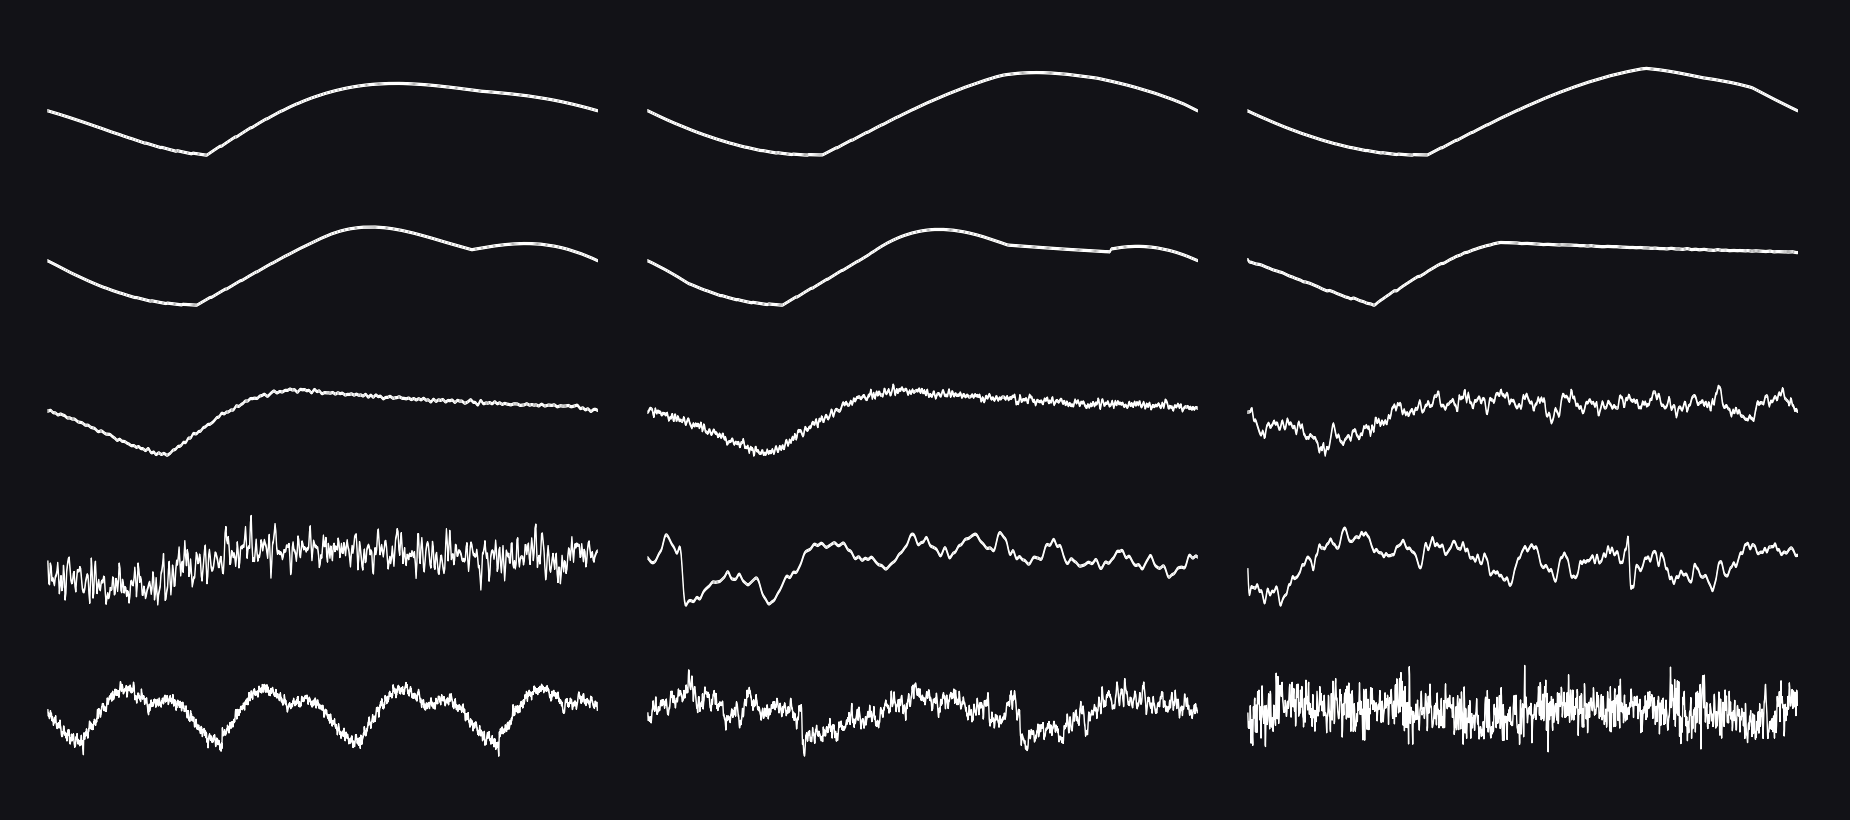
Spectral Triangle
Created by Meska.
This is a spectral triangle. The first half of the wavetable is a triangle doing amplitude modulation (AM) on itself. The other half is the same wave run through a spectral processor.
Download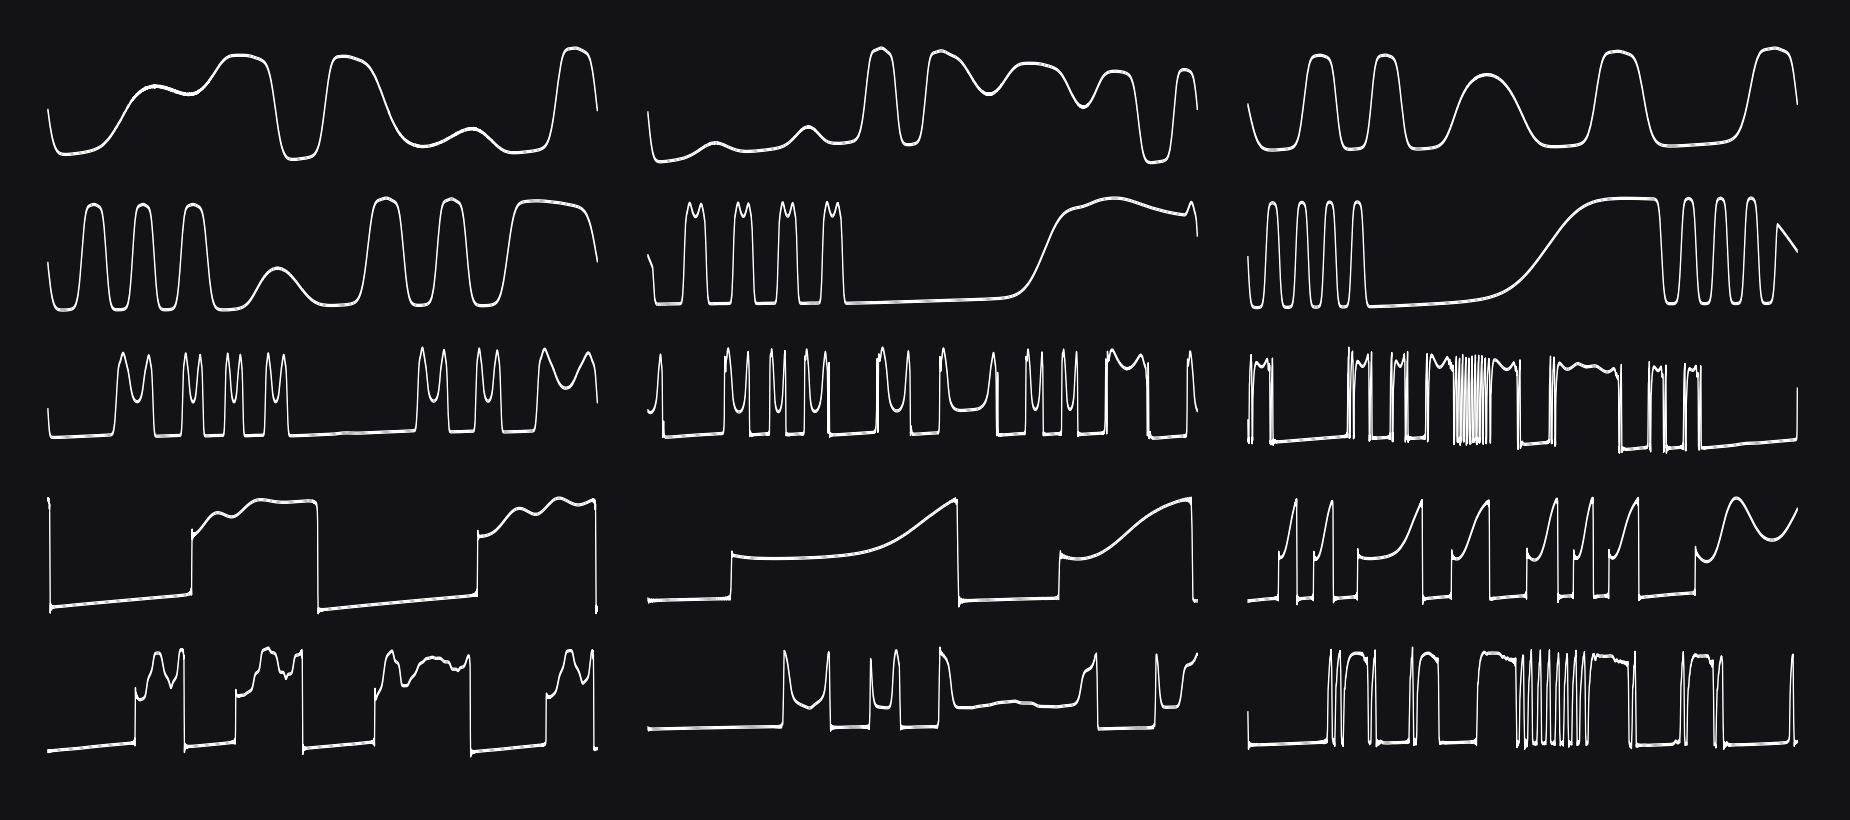
Vacuum Tube
Created by Meska.
This set goes from phase-modulated sine wave to vacuum tube feedback. It's a phase-mod sine (around 30%), then clipped by the vacuum tube, adding feedback. Around 70% you have a full-on tube feed, without any input. And after a selection of feeback waves, back to a phased sine wave.
Download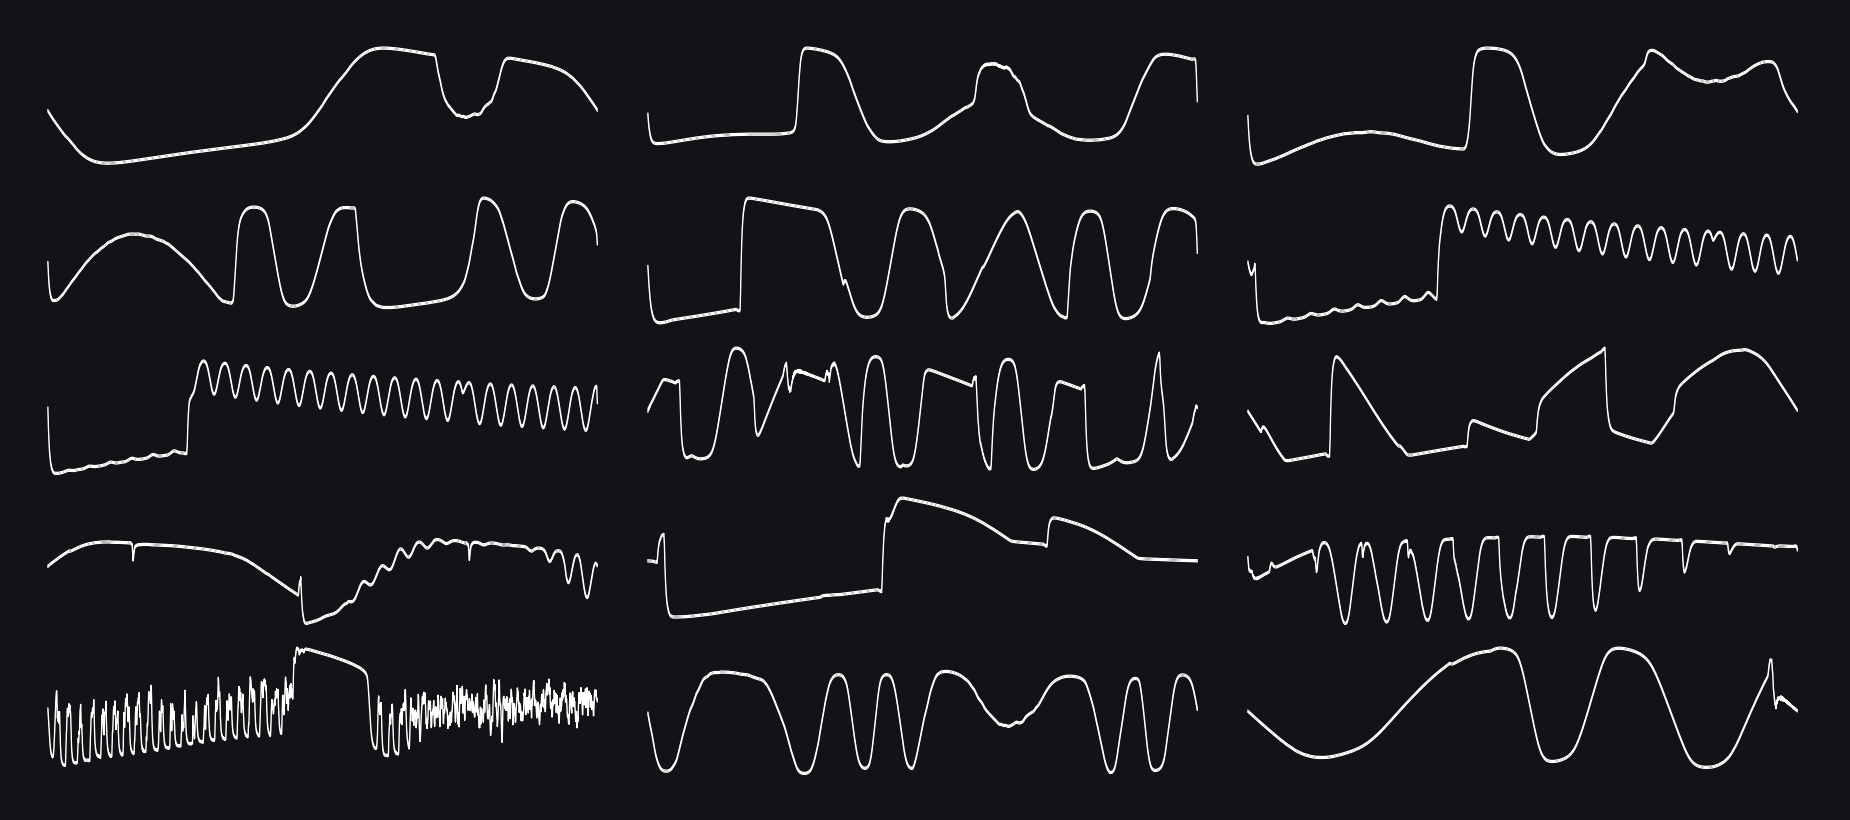
Wavefolder
Created by Meska.
If you want to try the wavetables I have made for Plinky these last couple of days, here they are. Its sine to wavefolding, to morphing wave-folded, to feedback and back to wavefolded sine. Perfect for smooth arpeggios and heavy basslines.
Download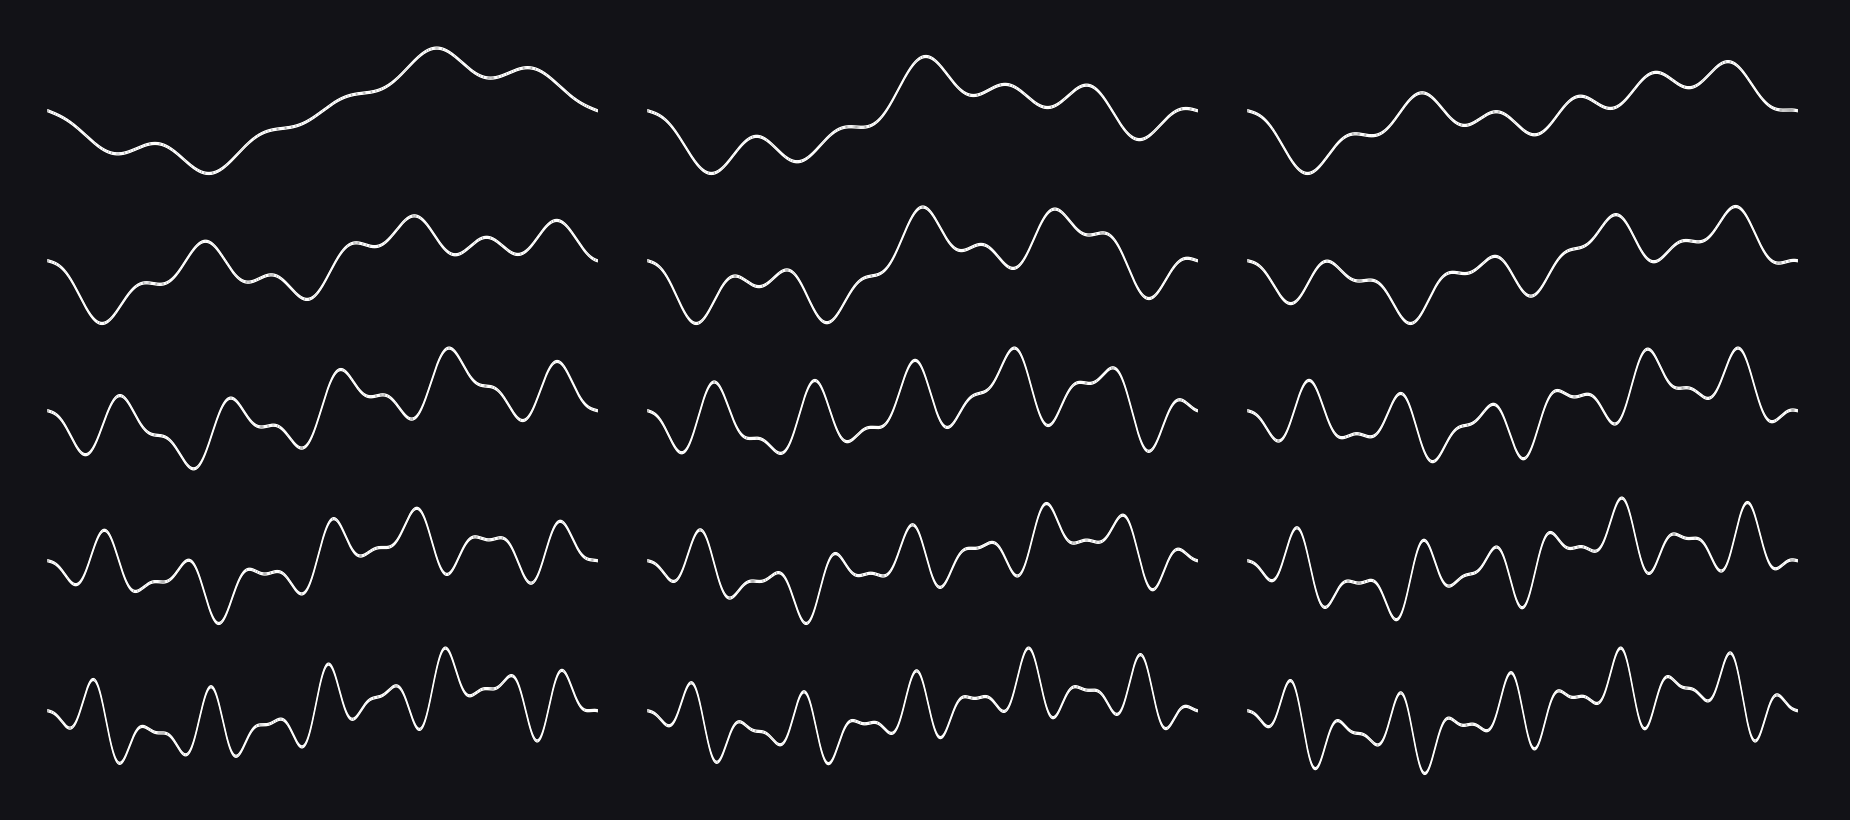
Phase Vowels
Created by Making Sound Machines.
This set was generated with the Phaseshaping Oscillator of Fors Chiral. Chiral is a great Max for Live plugin developed by Ess Mattisson and Felisha Ledesma, and it has a feature that lets you export single cycle waveshapes. This set sweeps through the overtones in a manner that results in very vowel-y, vocal sounds.
Download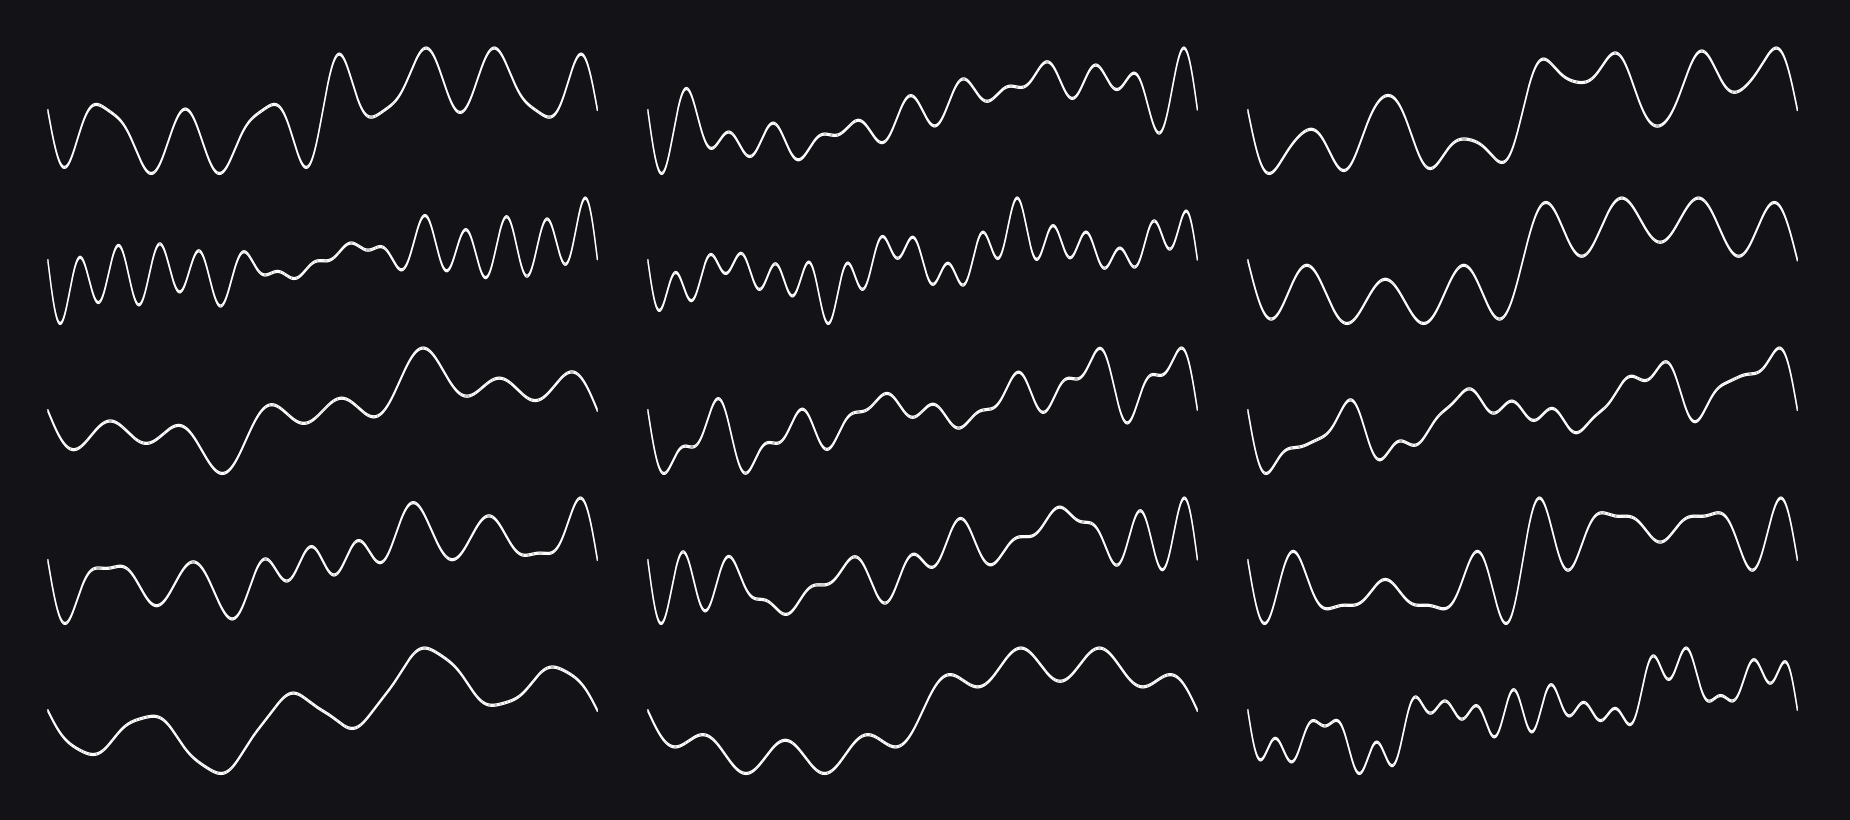
Additive Complex
Created by Making Sound Machines.
This set was generated with an additive generator. Think of it working like a drawbar organ, in that it lets you set an individual volume for each overtone / harmonic. In this set, the overtones for the waves were randomized. The result is the most varied wavetable set of the ones generated using the additive method, however in comparison to the FM wavetable banks, it still remains relatively mild and suitable for chords and harmonies.
Download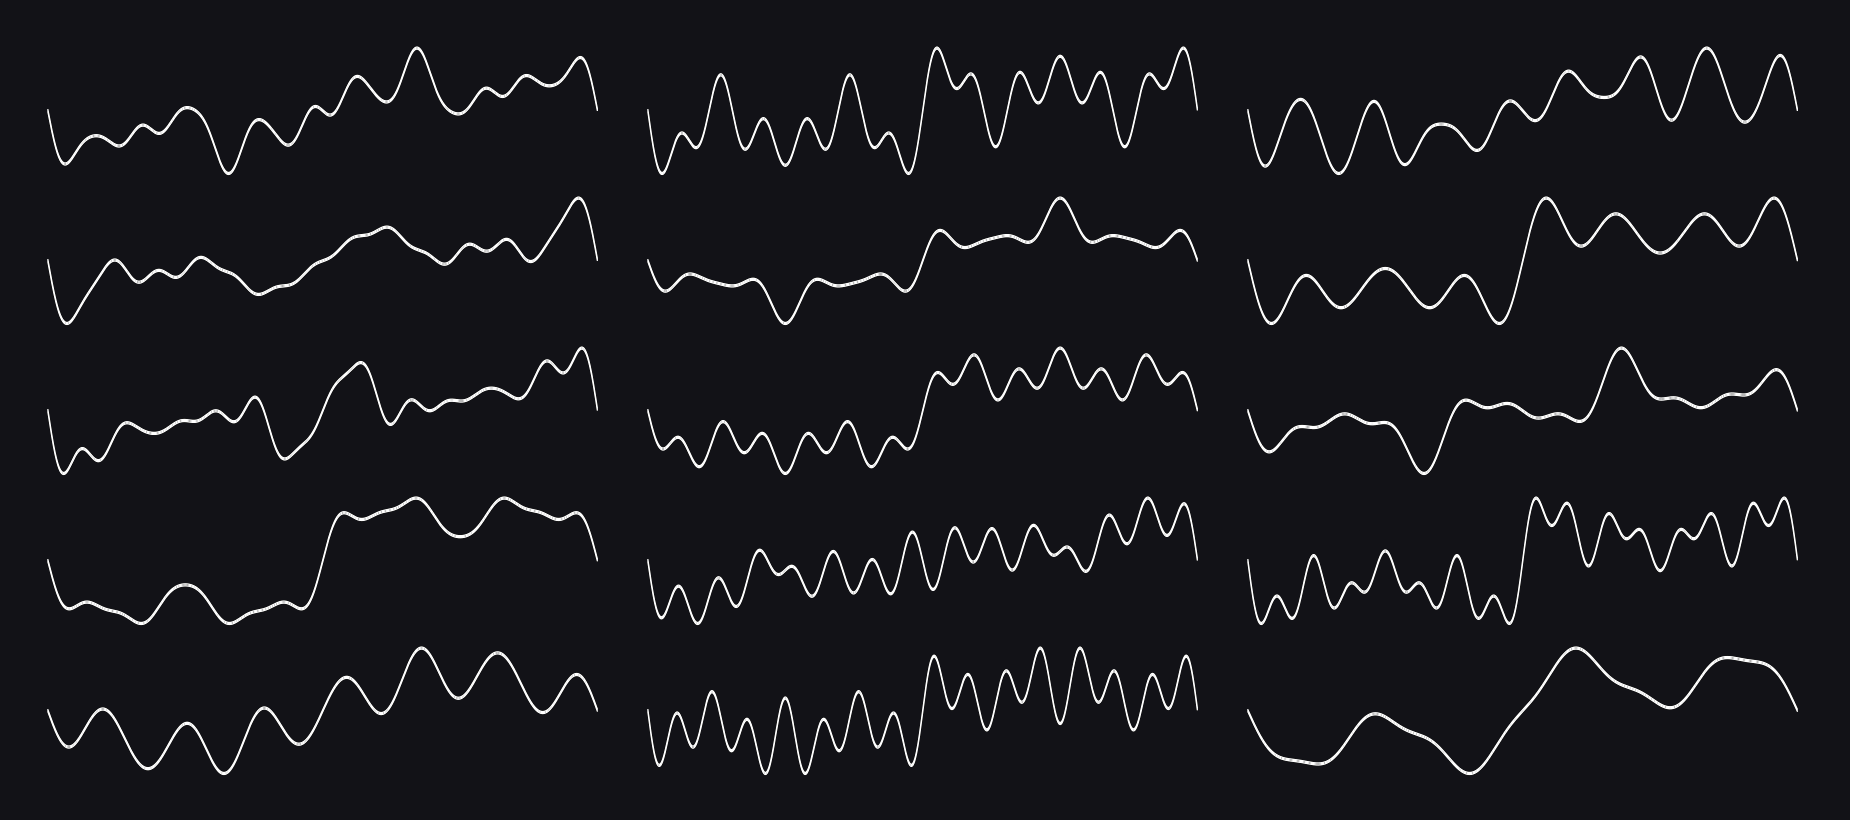
Additive Drawbar
Created by Making Sound Machines.
This set was generated with an additive generator. Think of it working like a drawbar organ, in that it lets you set an individual volume for each overtone / harmonic. In this set, the waves resemble organ tones, each with an individual mix of overtones. In higher registers, this bank has an organ sound to it.
Download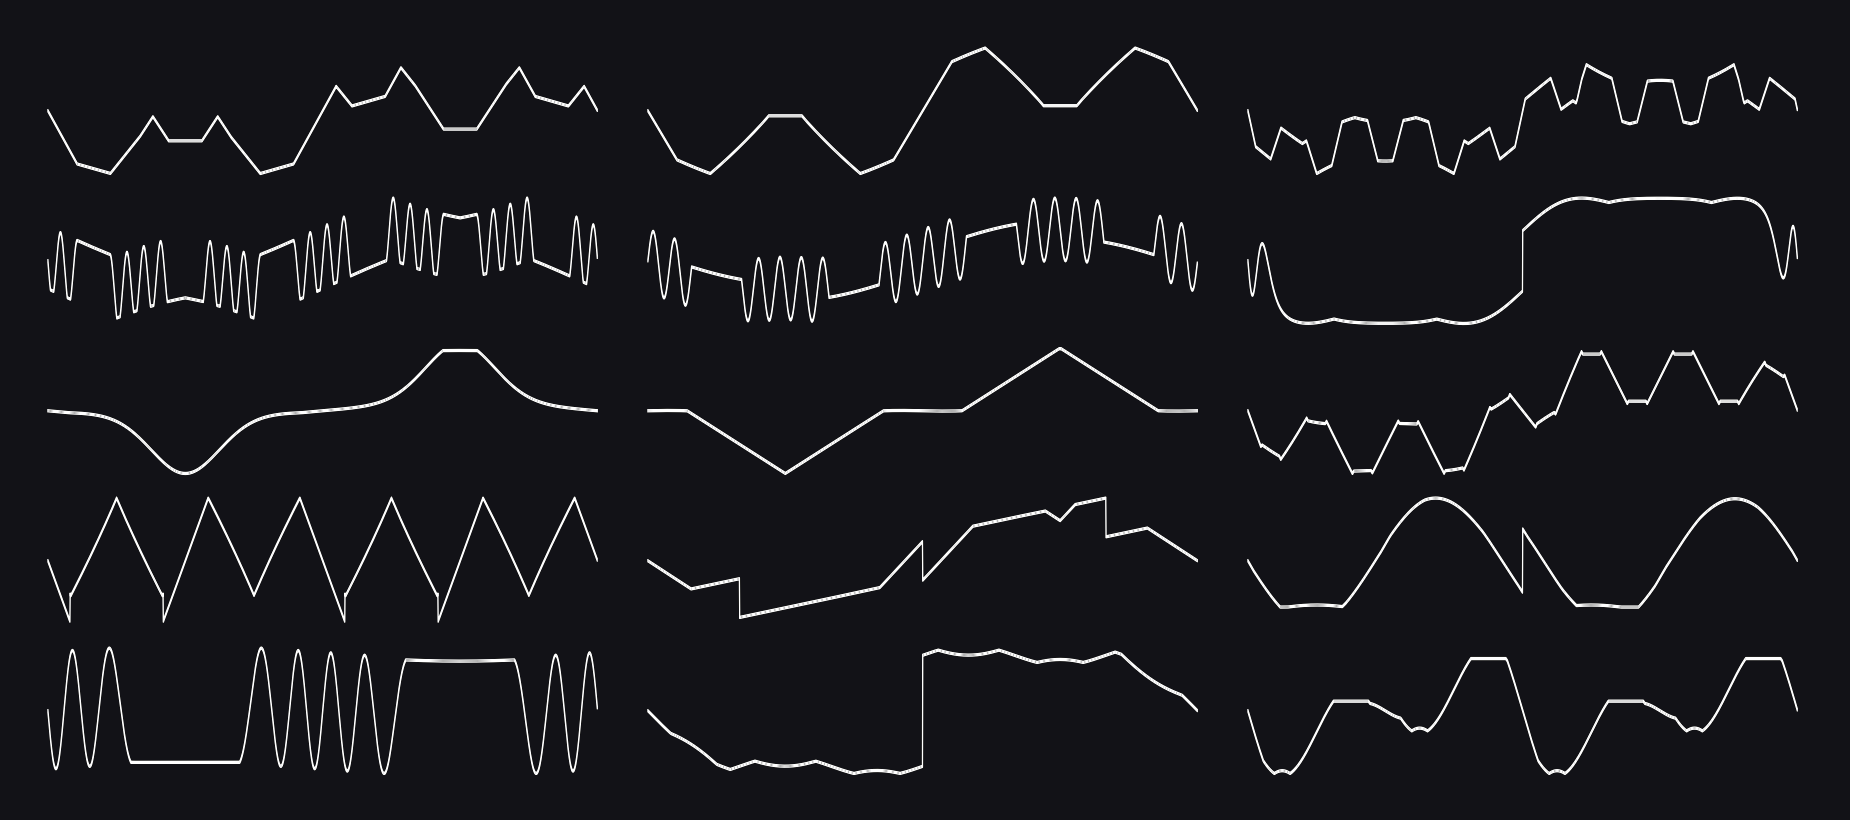
FM Complex
Created by Making Sound Machines.
This set was generated with an FM generator. The one used here was two-operator, but with individual waveforms for both and a number of interesting offset and drive options. In this set, the waves were designed to have stronger individual characteristics, like pulses, edges and intervals within the wave. The resulting sounds are interesting to use in achord context, as they bring their own harmonic material to the table. Some of the waveforms tend to sound glassy, others overtone-rich like C64 variants of square waveforms.
Download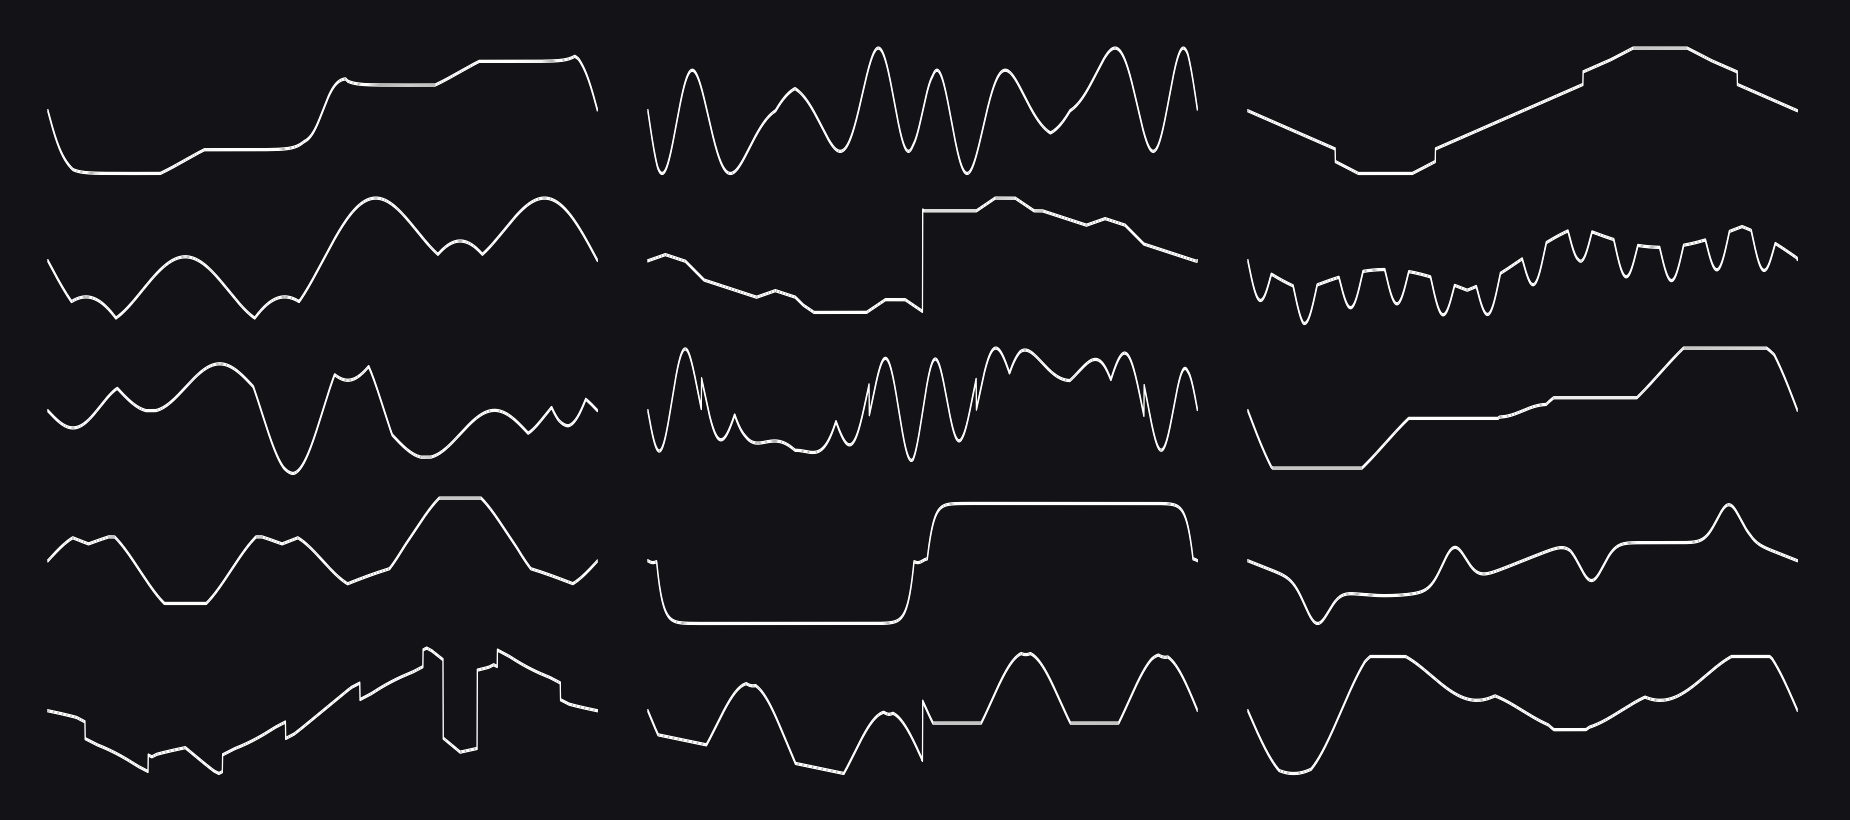
FM Overtones
Created by Making Sound Machines.
This set was generated with an FM generator. The one used here was two-operator, but with individual waveforms for both and a number of interesting offset and drive options. In this set, the waves were chosen for their rich overtones, making sweeps through the waveforms more variable in timbre. The resulting sounds have an emphasis in midrange harmonics, and can have a sparkly top end. This set of waves has strong vibes of retro-classic 8-bit gaming.
Download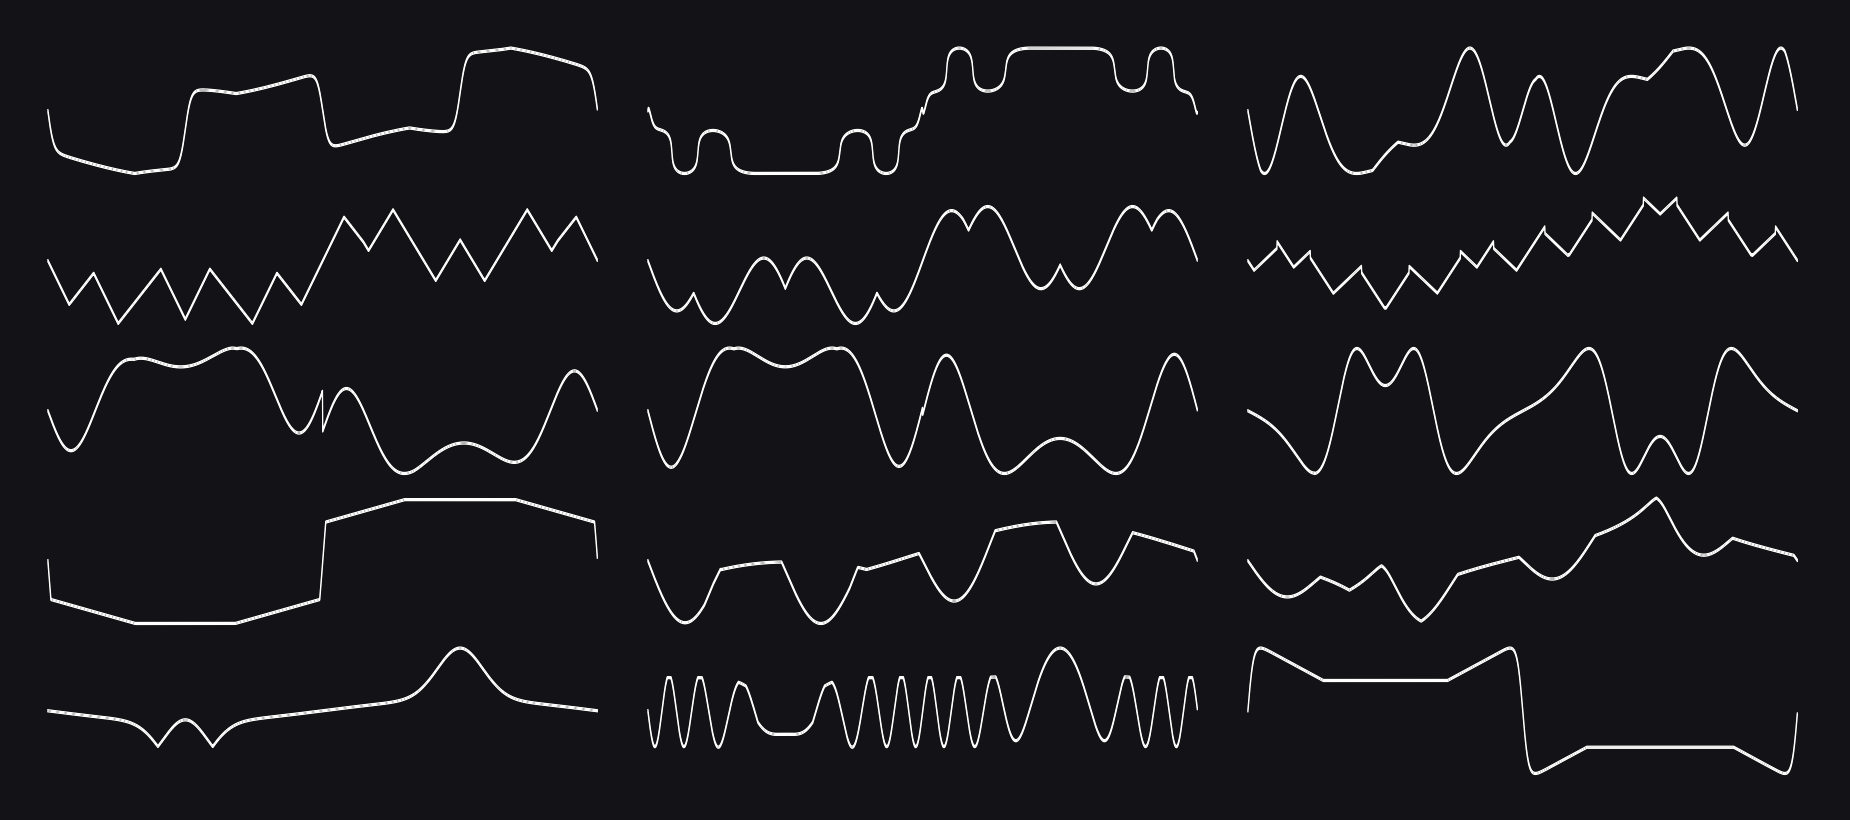
FM Harmonics
Created by Making Sound Machines.
This set was generated with an FM generator. The one used here was two-operator, but with individual waveforms for both and a number of interesting offset and drive options. In this set, the waves were designed to retain a strong fundamental, in order to keep them suitable for playing harmonies. The resulting sounds can be bright, depending on how you set the lowpass gate / touch sensitivity on Plinky. Some of the waveforms tend to be more nasal, while others have a richer sound to them.
Download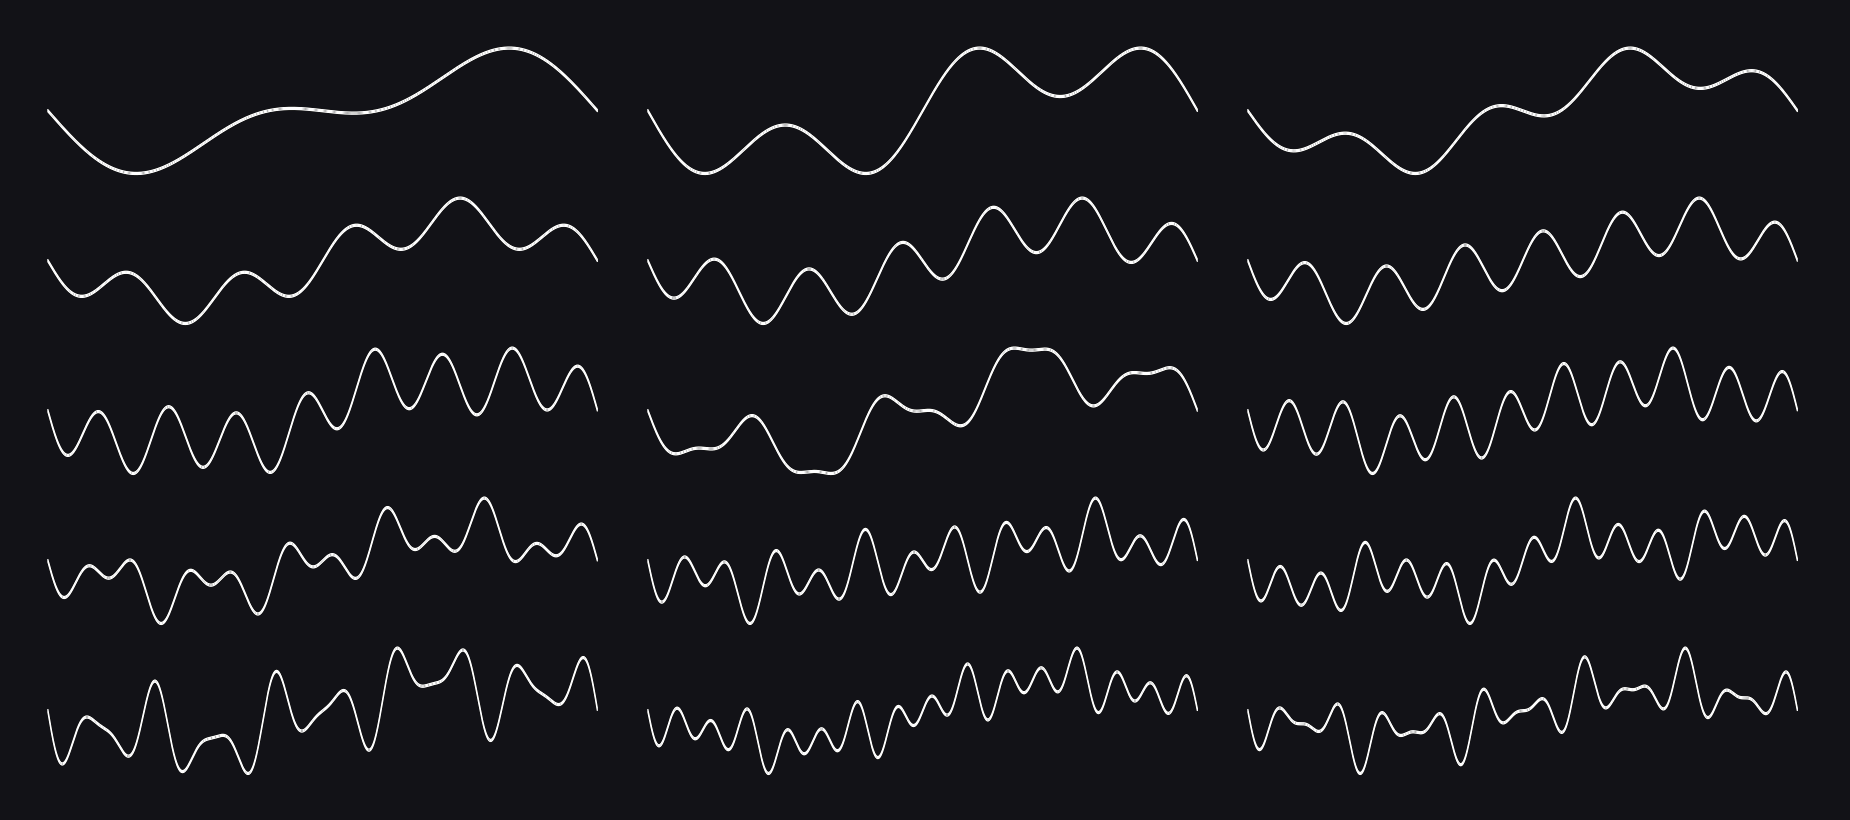
Additive Harmonics
Created by Making Sound Machines.
This set was generated with an additive generator. Think of it working like a drawbar organ, in that it lets you set an individual volume for each overtone / harmonic. In this set, the waves were designed to add just one or two specific overtones. The result is sonically similar to a bandpass filter, emphasising the root frequency and boosting one or a couple narrow bands from the spectrum. If you have a parameter or the encoder on Plinky set to the shape parameter, you can simulate sweeping through the overtones with this wavetable set.
Download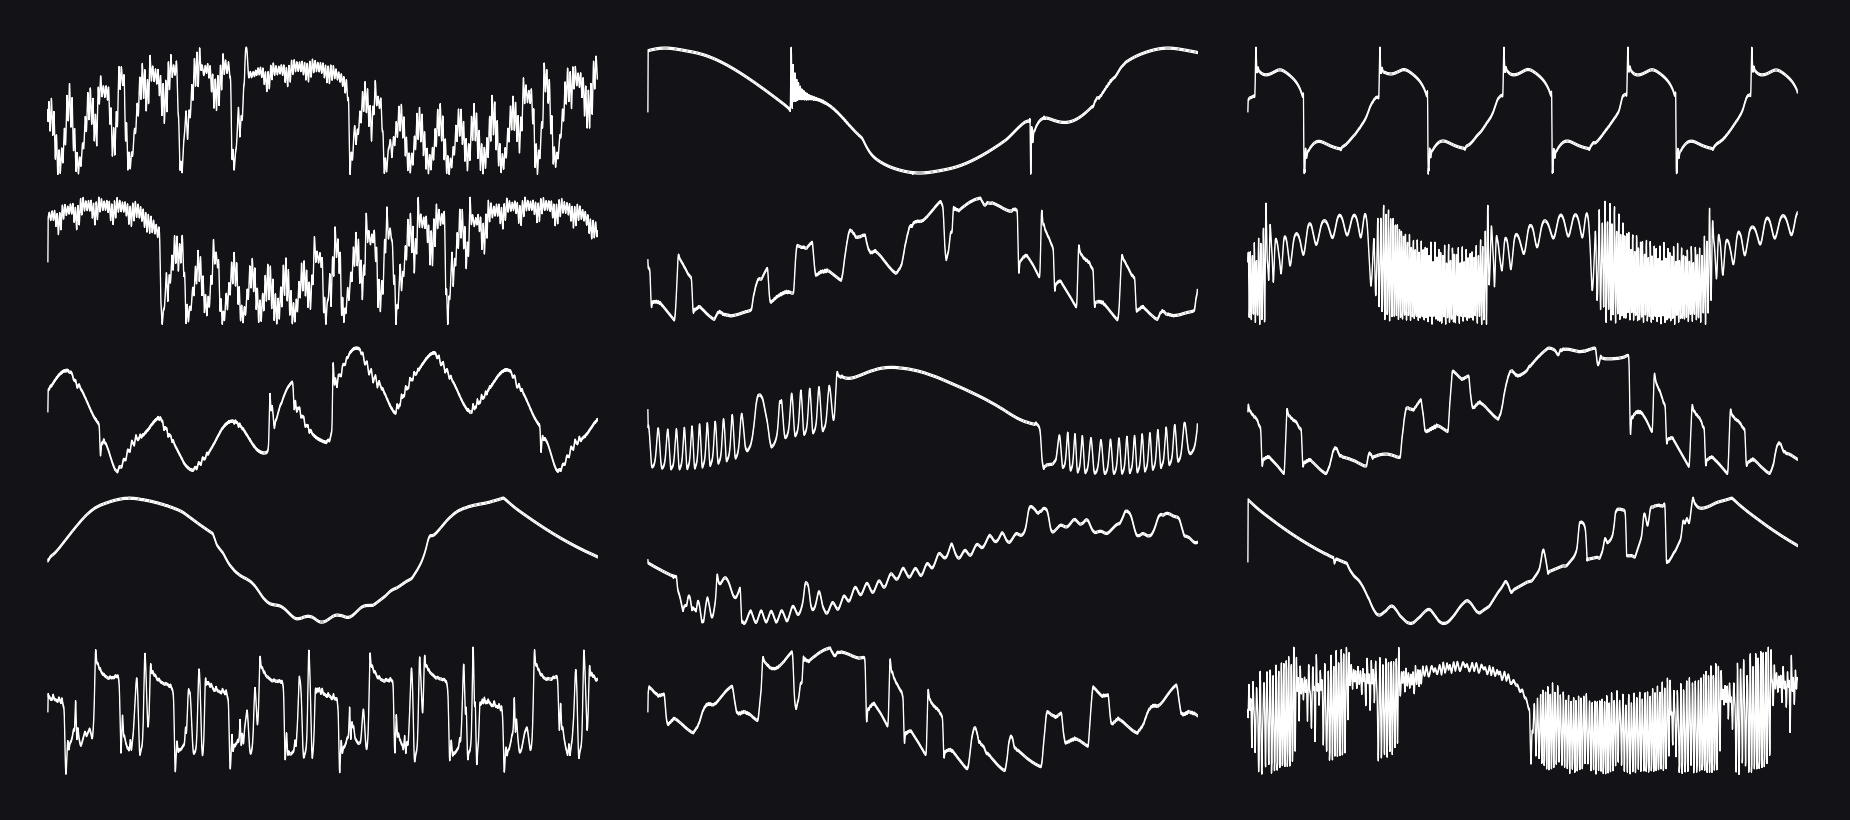
Plinky and Plinky+ – Wavetable install video
Nathan Plante has made a quick tutorial showcasing how to install a wavetable on Plinky and Plinky+ for his YouTube channel:
Thank you Nathan for the fantastic tutorial!
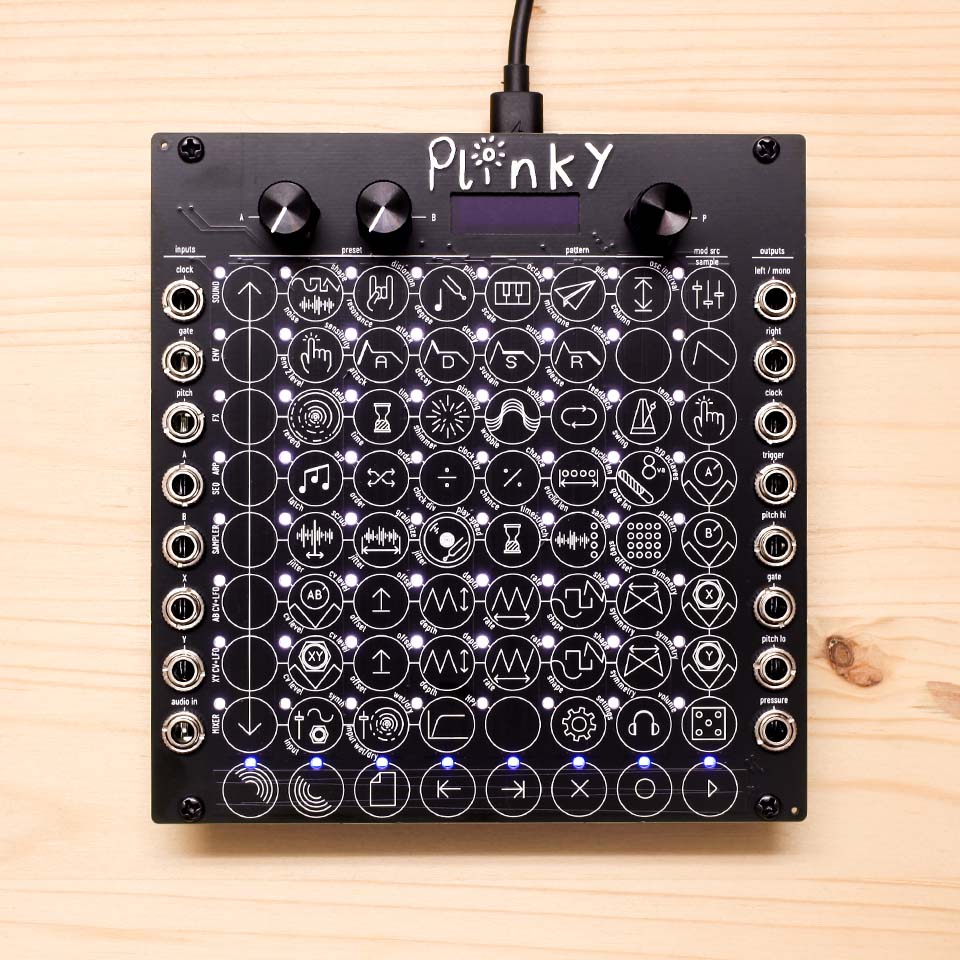
Plinky – Wavetable install instructions
Installing a wavetable takes only a few moments:
- Unplug all cables from Plinky
- Connect a USB cable to your Plinky
- Do not power from Eurorack at the same time, and use only one USB port
- Hold down the encoder (rightmost knob), and plug the USB cable into your computer
Plinky will show up as a drive and you should see the "tunnel of lights" effect on Plinky's LEDs.
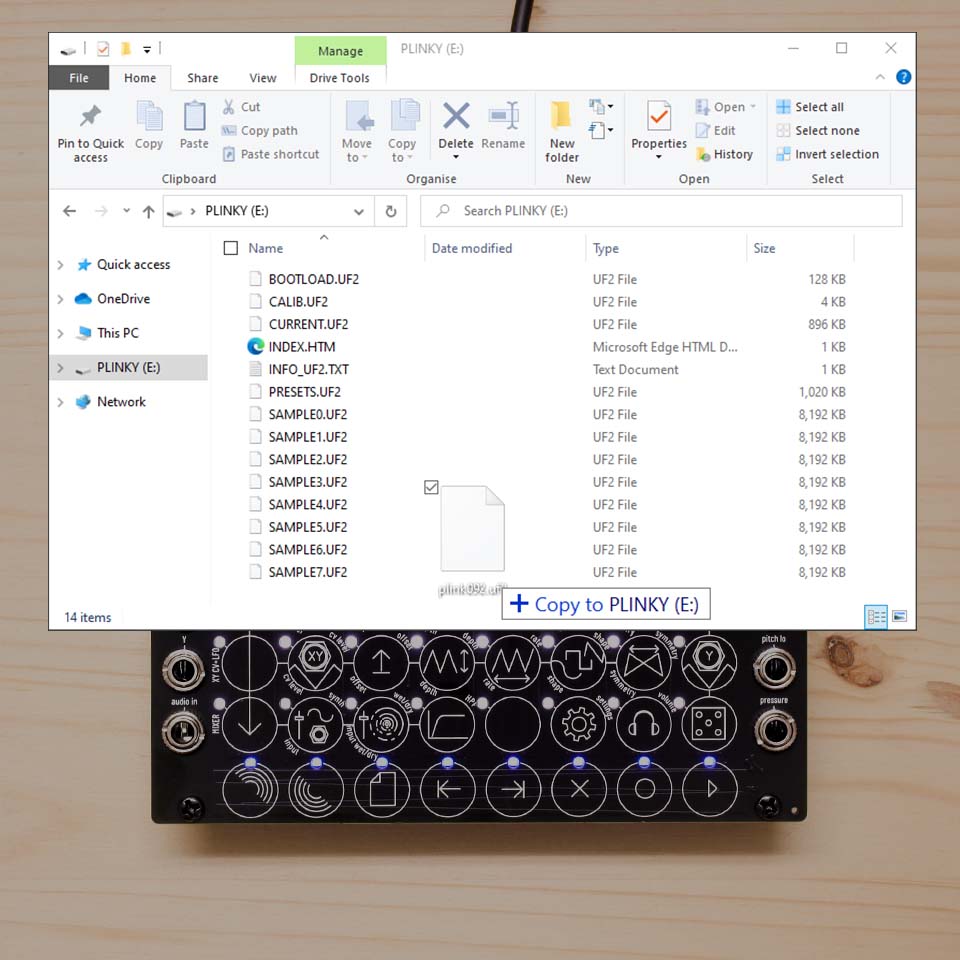
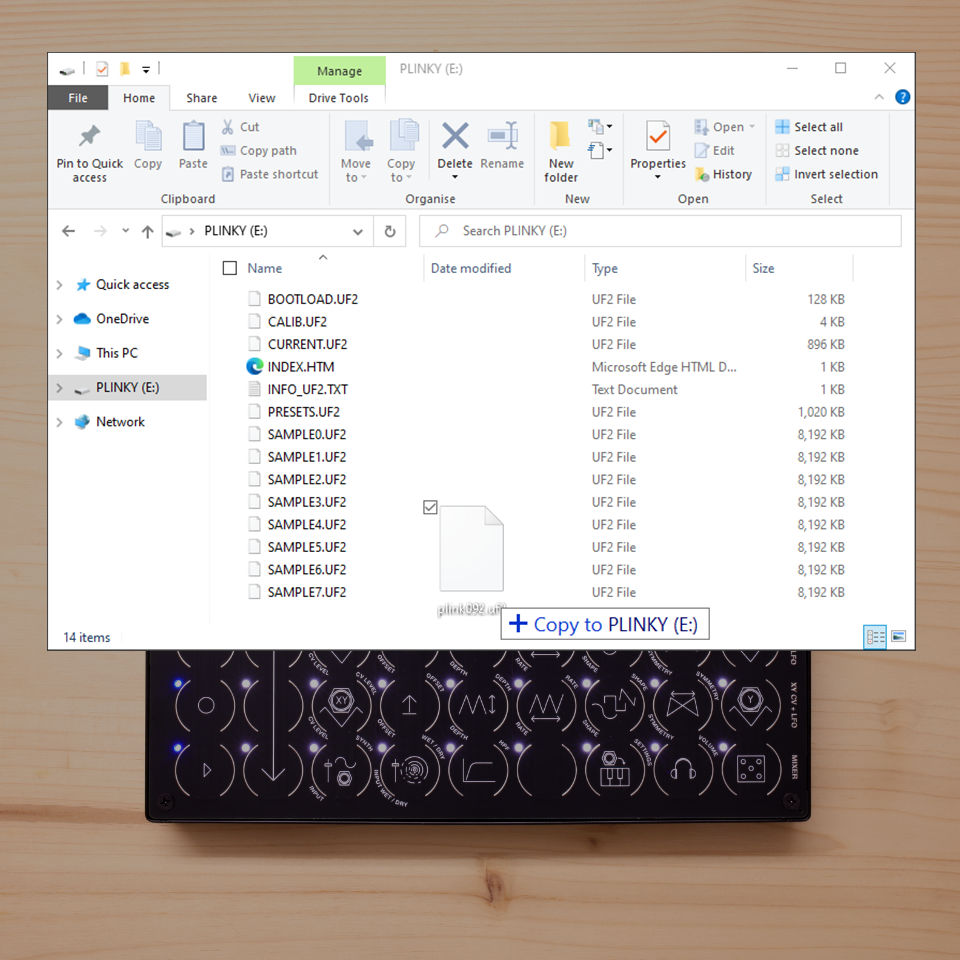
- Drag and drop
wavetab.uf2to the drive. Make sure the file is calledwavetab.uf2- do not rename. - While flashing, the LEDs will flicker. This is normal.
- To finish, just click the encoder again. Plinky will boot up and you should see the correct version number.
Plinky+ – Wavetable install instructions
Wavetables for Plinky and Plinky+ are cross-compatible.
- Unplug all cables from Plinky+
- With Plinky+ powered off, connect Plinky+ to a power source (PC or Mac USB port, or USB power adapter)
- Hold down the Encoder, and with it held down, press the on/off button to turn Plinky+ on
- The screen remains blank, and you’ll see a tunnel of flashing LEDs
- Plinky should show up on your PC as a USB Drive
- Drag and drop the
wavetab.uf2file onto the Plinky USB Drive
USB drive not showing up?