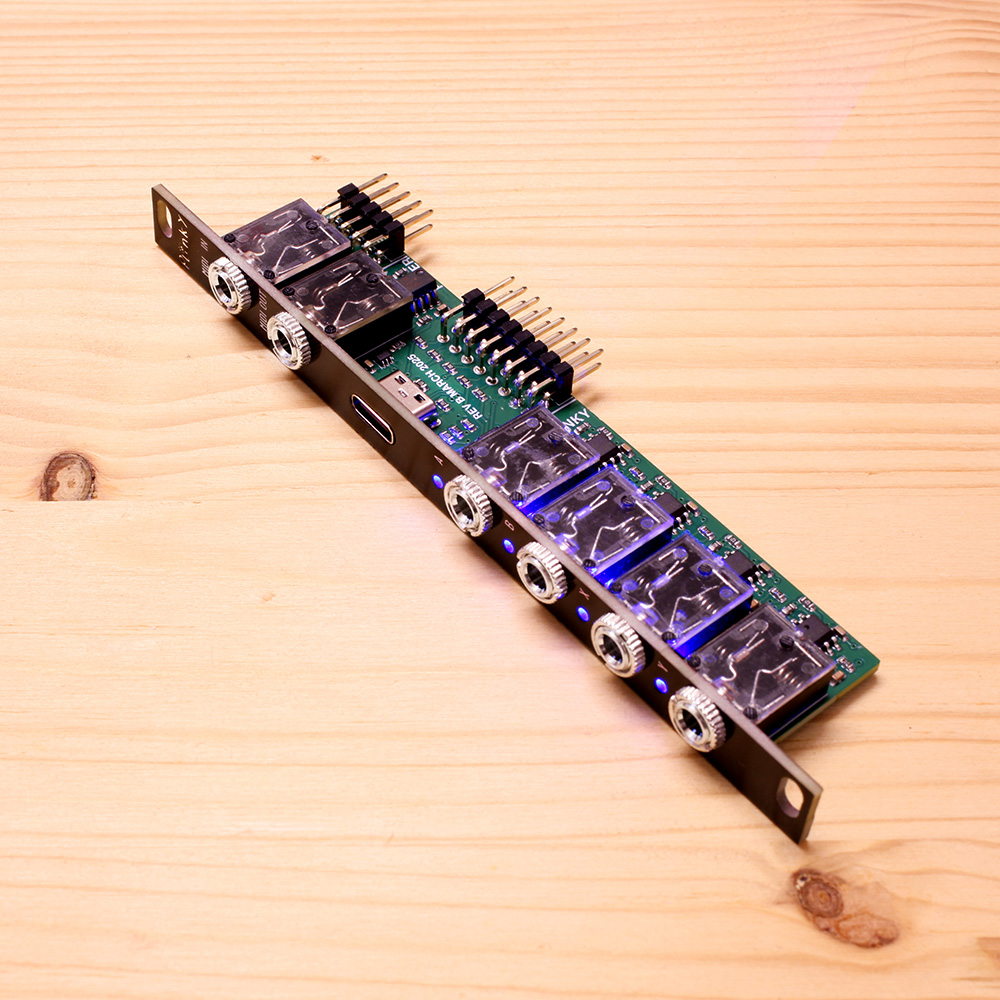
The Plinky Expander is a 2HP module that offers extra functionality when using Plinky in your Eurorack.
It adds four additional CV outputs to connect with the rest of your Eurorack setup, as well as a frontside USB port and TRS MIDI allowing you to access these ports when Plinky is rack mounted.
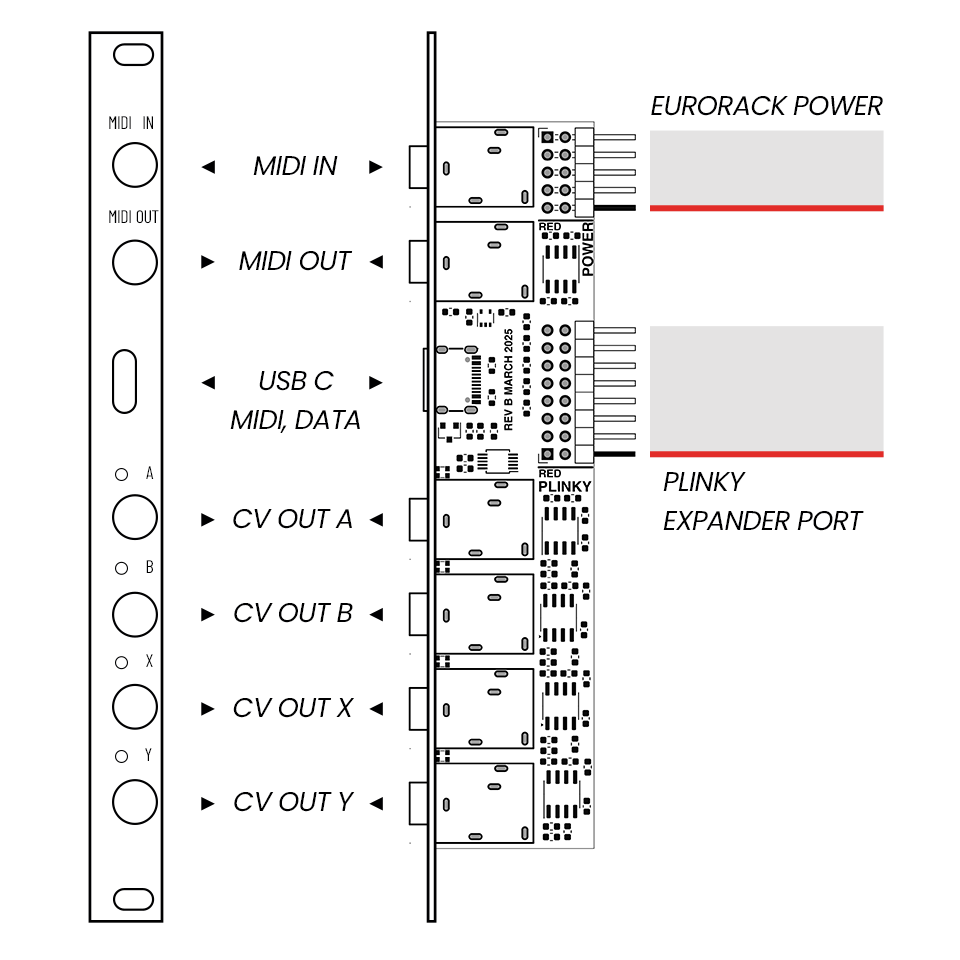
TRS MIDI Input
Supports both Type A (Korg) and B (Arturia).
It's the LPZW.modules Autocrossover circuit. Thank you Kay!TRS MIDI Output
Supports Type A (Korg)USB C
Edit patches and interface with MIDI over USB, and update Firmware with Plinky in the rack.
Note that you can not power Plinky from this port.A B X Y Outputs
Output Plinky‘s A B X Y modulation as CV
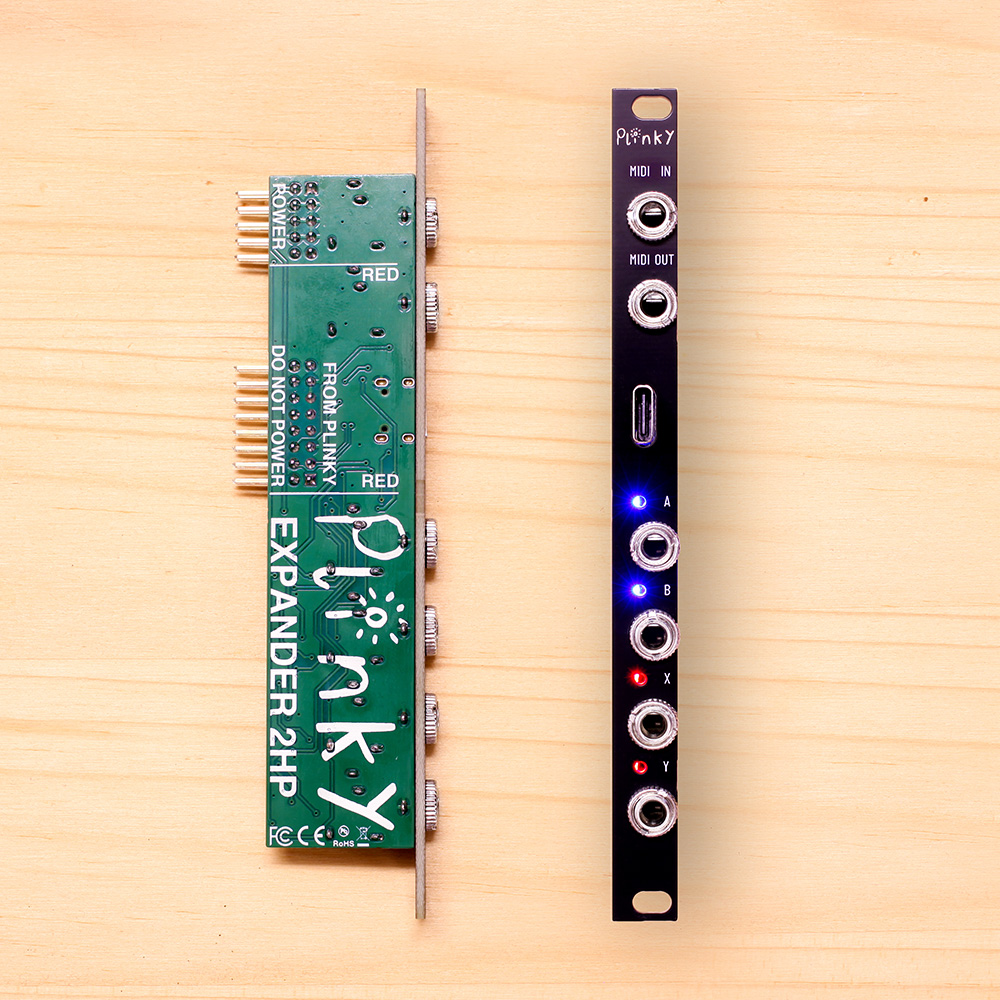
The 2HP Expander is an updated revision of the classic 4HP DIY Plinky Expander, now available as a factory-built and tested module offering the same features in a more compact form factor.
This version is compatible with Plinky v3 (black) and Plinky v2 (blue). For compatibility with Plinky v1 (green), you have to do a modification on your Plinky Expander port as described here.
Connect and Power
To connect Plinky with the Expander and use them both in your Eurorack setup, take the following steps:
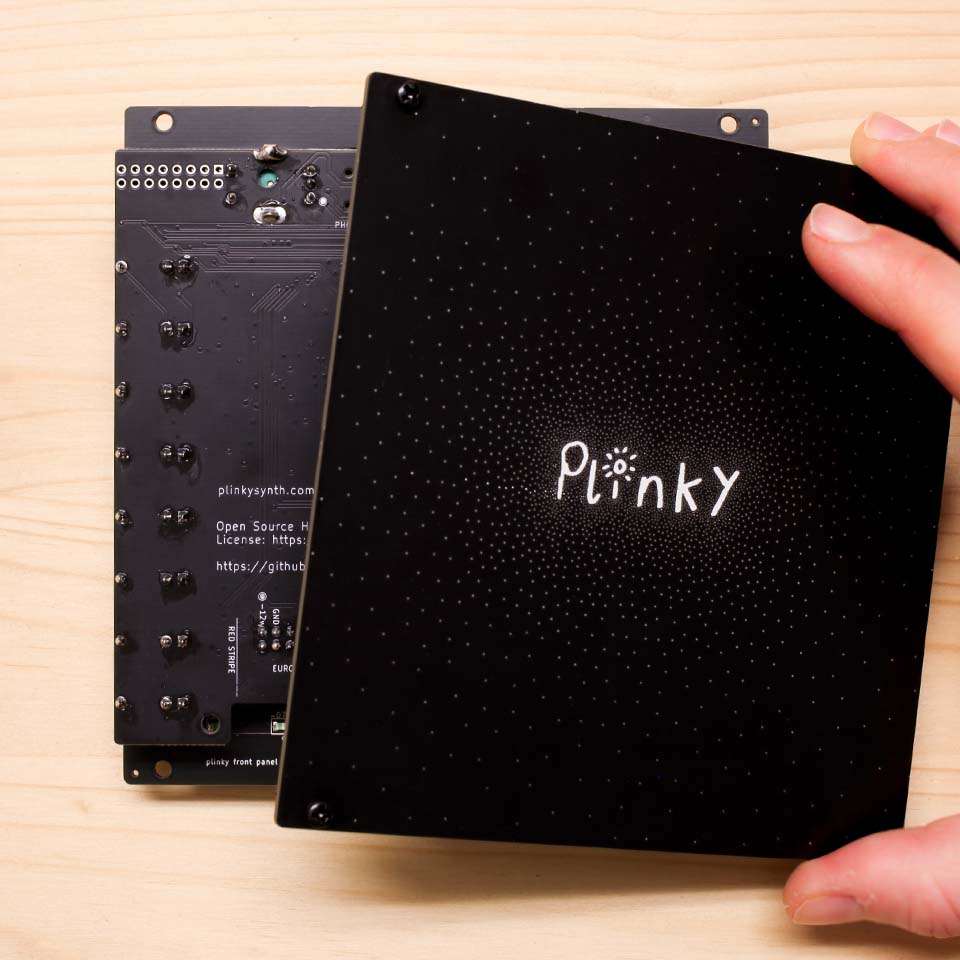
- On your assembled Plinky, remove the back plate including the four hex standoffs
- Connect Plinky and the Expander with a 2x8 ribbon cable
- Connect Plinky to Eurorack power with a 2x8 ribbon cable
- Connect the Expander to Eurorack power the the 2x5 ribbon cable
The Expander's power consumption is
- 8 mA +12V
- 15 mA -12V
- 0 mA 5V
Remove the back plate
Plinky fits in standard Eurorack rails. On your assembled Plinky, remove all connected cables. Unscrew the four black M3 Phillips screws in each of the four corners of the front panel, and remove the back panel including the four hex standoffs. Turn Plinky over.
Connect Plinky with the Expander
On the backside of Plinky, there is a cutout in the middle of the PCB that houses an angled 2x8 connector, labelled "Don’t plug Power here. It’s an Expander port."
Plug in the broad 2x8 ribbon cable. Both the cable and socket are keyed. If you have trouble fitting the connector through the slot, you can remove the plastic strain relief on one side of the cable using snipe-nosed pliers. On the expander, plug the cable into the angled 2x8 pin header labelled "From Plinky. Do not Power." The red stripe on the ribbon cable needs to match the Red Stripe mark on both PCBs.
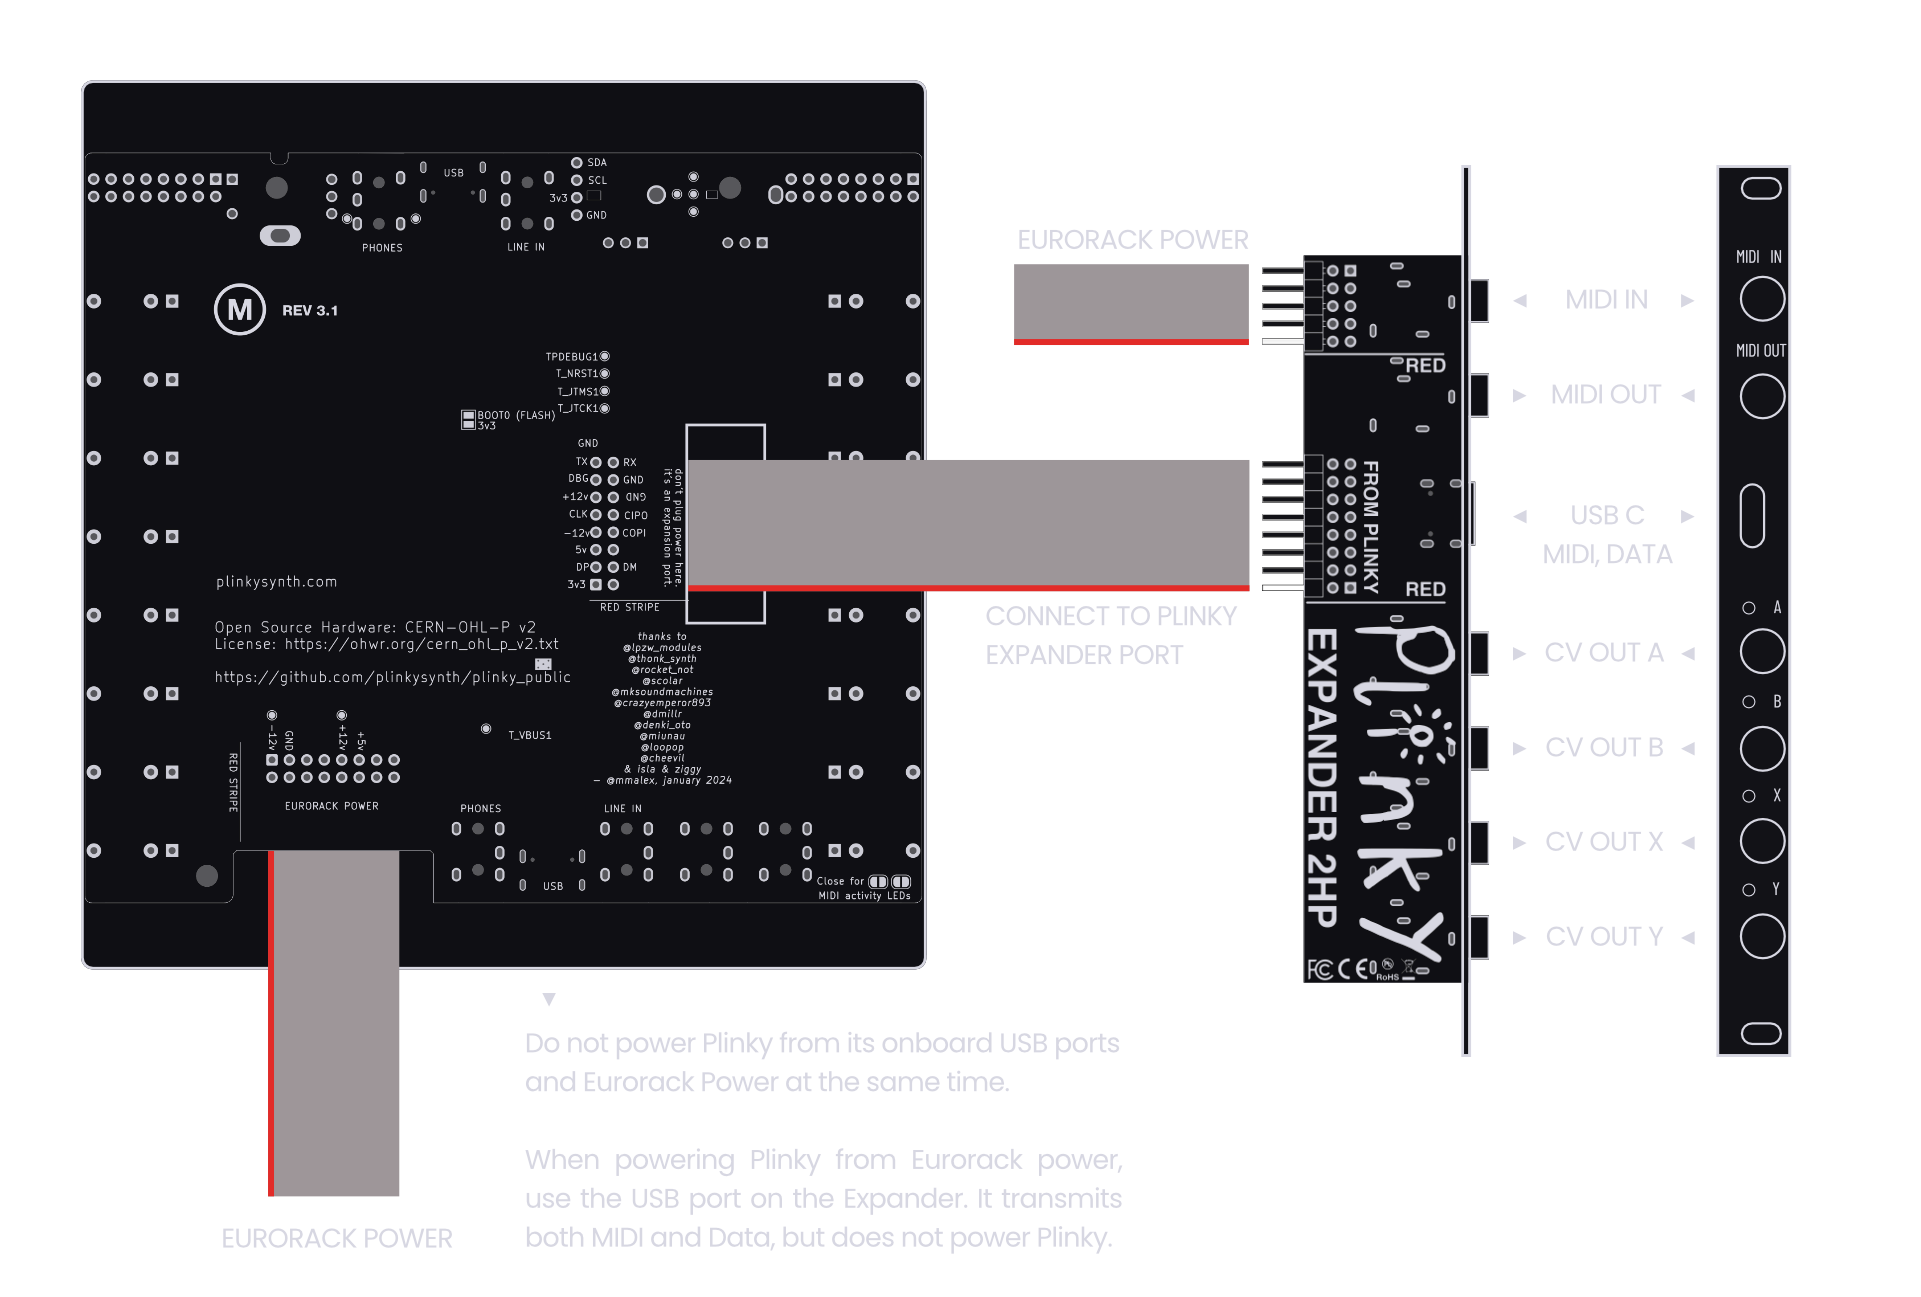
Connect Plinky to Eurorack power
On the bottom of Plinky, find the angled 2x8 power socket, labelled "Eurorack power". Plinky comes with a broad 2x8 ribbon cable to connect it to a -12V / +12V Eurorack power supply. Use the ribbon cable to connect the 2x8 pin header to the bus board of your Eurorack case. The red stripe on the ribbon cable needs to match the Red Stripe mark on both Plinky and bus board.
Do not power Plinky from its onboard USB ports and Eurorack power at the same time. When powered from Eurorack power, use the USB port on the Expander. It transmits MIDI and Data, but does not power Plinky.
Connect the Expander to Eurorack power
The Expander has an angled 2x5 pin header, labelled "Power". A slim 2x5 ribbon cable is included. Use it to connect the 2x5 pin header to the bus board of your Eurorack case. Again, the red stripe on the ribbon cable needs to match the Red Stripe mark on both Expander and bus board.
Using Plinky with Eurorack
Plinky offers dedicated CV inputs and outputs to communicate with modular gear. The implementation for gates differs slightly from what’s usual in Eurorack, so here is how you set it up as a Eurorack oscillator:
 tap Select a patch in Preset Mode. Tap or hold the preset pad, then tap a main pad to select a preset (left 32 pads). An initialized patch or Grain Blanc Bank works great for this purpose. Tap the preset pad again to exit.
 hold
hold  tap
tap
Enable latch by holding Shift Down and tapping the Arp pad. This switches the latch on or off. Set it to ON. Now played notes will sustain even when you take your fingers off plinky.
This setting will save with your preset.
Press the lowest pad. you hear a drone.
Using a Eurorack Sequencer or CV capable keyboard such as the Arturia Keystep as a CV source:
- Patch gate out from your sequencer or keyboard to gate in on Plinky. The drone goes away.
- Patch V/oct CV out from your sequencer or keyboard to pitch CV in on Plinky.
Play the Eurorack Sequencer, or play keys on the CV capable keyboard so it outputs V/oct CV and gates. The V/oct CV pitches the drone on Plinky around. Gate opens the lowpass gate. Some things to explore:
- While the Sequencer sends an open gate, tap another pad and your notes will be transposed.
- While the Sequencer sends an open gate, tap two notes on Plinky‘s surface and you can have chords.
Most presets are not latched by default. But if you set Latch to ON, it will be saved with the preset. Each time you power cycle your case, unpatch the gate cable and press the lowest pad, once, to start the drone.
Modulation A, B, X and Y
The Bottom four jacks on the expander output the A, B, X and Y modulation as CV with a -5V to 5V range. On Plinky, two rows of pads control the parameters for the A, B, X and Y modulators. Each of the rows are split, so that SHIFT TOP and SHIFT BOTTOM access one of the two inputs.
 hold
hold 


 tap
tap
- CV A SHIFT TOP on the A/B row (pictured)
- CV B SHIFT BOTTOM on the A/B row
- CV X SHIFT TOP on the X/Y row
- CV Y SHIFT BOTTOM on the X/Y row
LFOs & Knobs
Each of the A, B, X, or Y modulators has a built in LFO that is added on top so that the modulation sources can be used without an incoming signal on the front panel jacks. Modulators A and B correspond to knobs A & B, which offset these two values.
CV Level
 These pads control an attenuator for the signal coming from the A, B, X, or Y CV input jacks on Plinky's front panel. Turn this up if you want to use the incoming CV as modulation, and forward the CV coming in from the jacks on Plinky‘s panel to the Expander CV outs.
Offset
This parameter offsets the CV and / or LFO. Imagine this as a constant voltage that is being added (or subtracted) from the sum of the A, B, X, or Y CV input and the LFO.Set this to add or subtract a constant voltage from the Expander‘s A, B, X, or Y CV output
LFO Depth
This control acts as an attenuator for the internal LFOs. The default level is zero, so turn this up if you want an LFO for modulation and output it on the Expander‘s A, B, X, or Y CV out. The value of this parameter determines the LFO amplitude on the CV output.
LFO Rate
Controls the rate of the internal LFO. The LFO rates can range from milliseconds at +100% to 20 seconds at -100%. Turn this up if you want the LFO for modulation and on the Expander‘s CV output to go faster, or down if you want it to go slower.
LFO Shape
This parameter sets the shape of the LFO.
The following shapes are available:
- Triangle
- Sine
- SmthRnd (Smooth Random)
- StepRnd (Stepped Random)
- BiSquare (Bipolar Square wave, -5v - +5v)
- Square (Unipolar Square wave 0v - +5v)
- Castle (-1 0 1 0 -1 0 1 0, looks like a sandcastle)
- BiTrigs (Trigger pulses in positive and negative direction)
- Trigs (Trigger Pulses in positive direction)
- Env (a shape with a logarithmic rise and fall)
LFO Symmetry
This parameter sets the slope of the LFO shape - for example turning a triangle wave into a sharp ramp up (symmetry +100) or down (symmetry -100). Set this if you want to tilt the shape of the LFO wave for modulation and on the Expander CV outs.
Midi CCs - Input
Here's a list of all the CC parameters that Plinky listens to.
Oscillator
| CC | Parameter |
|---|---|
| 13 | Shape |
| 4 | Distortion |
| 9 | Pitch |
| 14 | Interval |
| 2 | Noise level |
| 5 | Glide |
| 71 | Resonance |
Arpeggiator
| CC | Parameter |
|---|---|
| 101 | Latch |
| 102 | On/off |
| 103 | Order |
| 104 | Clock division |
| 105 | Chance |
| 106 | Euclid length |
| 107 | Octaves |
Sequencer
| CC | Parameter |
|---|---|
| 108 | Order |
| 109 | Clock division |
| 110 | Chance |
| 111 | Euclid length |
| 11 | Gate length |
| 83 | Pattern |
| 85 | Steps |
Envelope 1
| CC | Parameter |
|---|---|
| 3 | Sensitivity (LPF amount) |
| 73 | Attack |
| 74 | Sustain |
| 75 | Decay |
| 72 | Release |
Envelope 2
| CC | Parameter |
|---|---|
| 19 | Level |
| 20 | Attack |
| 21 | Decay |
| 22 | Sustain |
| 23 | Release |
FX - Delay
| CC | Parameter |
|---|---|
| 94 | Delay send amt |
| 12 | Delay time |
| 112 | Delay pingpong |
| 113 | Delay wobble |
| 95 | Delay feedback amt |
Modulation A B
| CC | Parameter |
|---|---|
| 24 | A Rate |
| 25 | A Depth |
| 26 | A Offset |
| 27 | B Rate |
| 28 | B Depth |
| 29 | B Offset |
Modulation X Y
| CC | Parameter |
|---|---|
| 76 | X Rate |
| 77 | X Depth |
| 78 | X Offset |
| 79 | Y Rate |
| 80 | Y Depth |
| 81 | Y Offset |
FX - Reverb
| CC | Parameter |
|---|---|
| 91 | Reverb send amt |
| 92 | Reverb time |
| 93 | Reverb shimmer |
| 114 | Reverb wobble |
Sampler
| CC | Parameter |
|---|---|
| 15 | Scrub |
| 16 | Grain size |
| 17 | Play speed |
| 18 | Timestretch |
| 82 | Sample |
Sampler Jitter
| CC | Parameter |
|---|---|
| 116 | Jitter position |
| 117 | Jitter grain size |
| 118 | Jitter rate |
Mixer
| CC | Parameter |
|---|---|
| 89 | External In Volume |
| 90 | External In Wet / Dry |
| 31 | HPF amount |
| 7 | Synth Level |
| 8 | Wet / Dry |
Midi CCs - Output
Plinky supports MIDI out over USB and TRS (since hardware v3, or if you have the Expander).
Plinky’s implementation has polyphonic aftertouch.
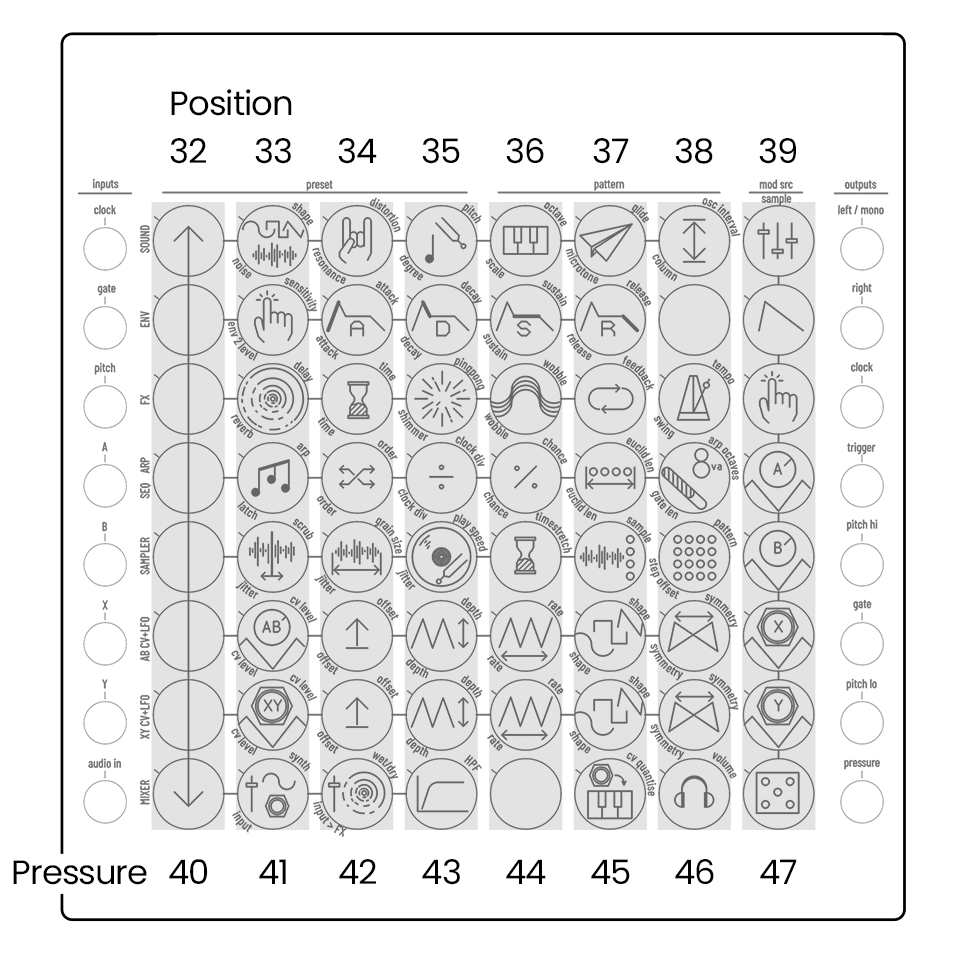
In addition to that,
- the finger position for each column is sent on CC 32 - 39,
- and the pressure for each column is sent on CC 40 - 47.