There is an eurorack expander available for Plinky! Its hardware is open source, available at https://github.com/plinkysynth/plinky-expander PLEASE NOTE that it is at 'prototype' stage. the files for assembly at JLCPCB are included in the repo, but order at your own risk!
Here are the first rough build instructions.
For V1 Plinkies
This step is only required for the first-run Plinkies (green mainboard). if your main-board is blue, this step is not needed.
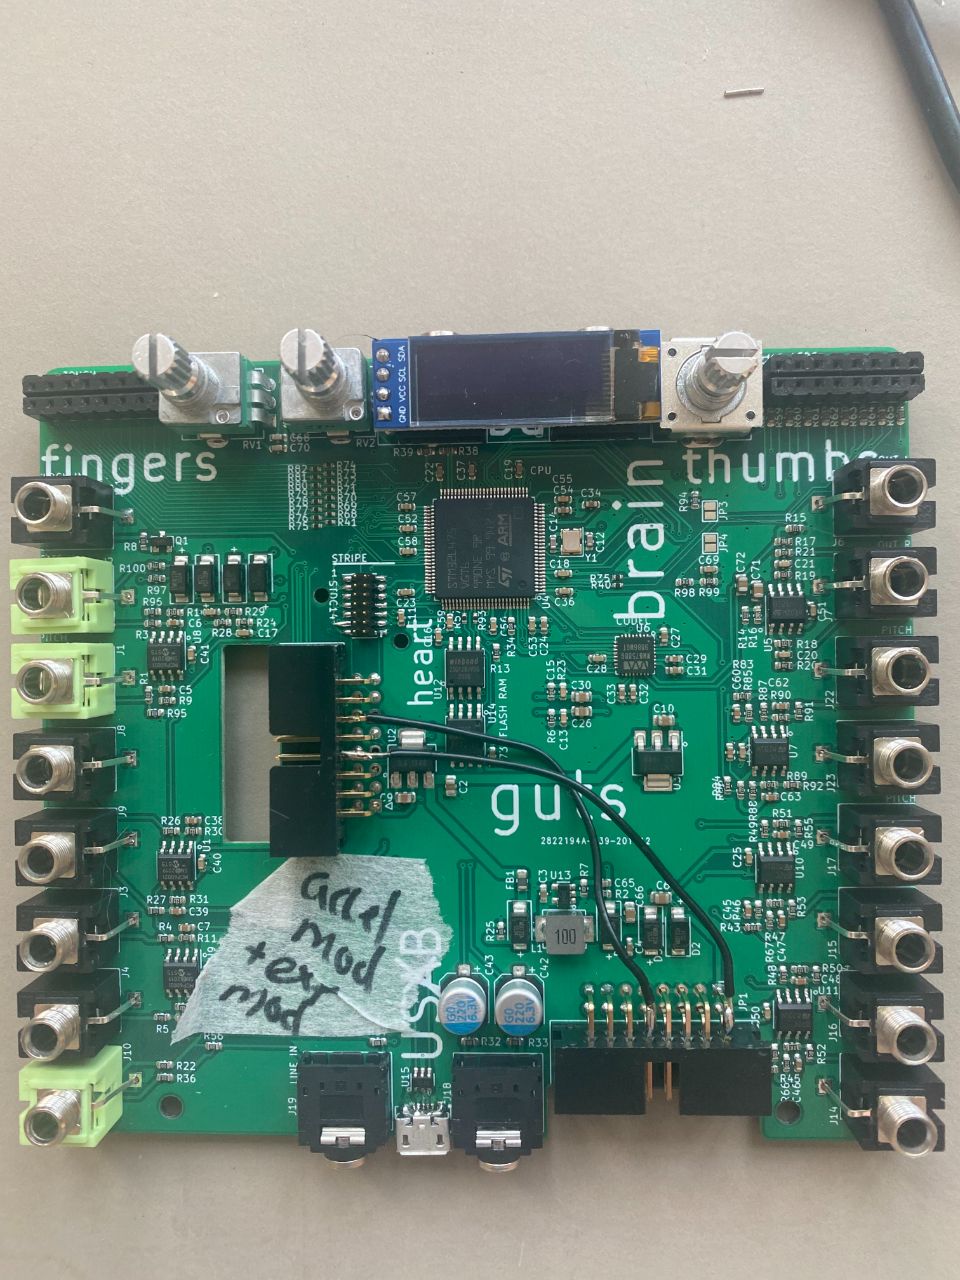
The first step is to solder the right-angle 16 pin header to plinky expansion port AND THEN IF YOU HAVE A V1 PLINKY, MOD YOUR PLINKY!
The third and fifth pins from the top, on the 'upper layer' (so easy to get to) need to be SNIPPED so that they dont connect thru to the PCB. if they do, they will short your power supply. instead, solder 2 wires to the snipped pins, and route them as shown to the euro power connector on plinky. NOTE THAT THE WIRES CROSS. Triple check your connections against the photo above; if you get them the wrong way around, you will damage your expander.
Note, that the expander can be powered via this bodge from plinky USB no problem. plinky generates +-12v and then routes it via this bodge to the expander.
Expander pack
This is the stuff you need to make an expander:
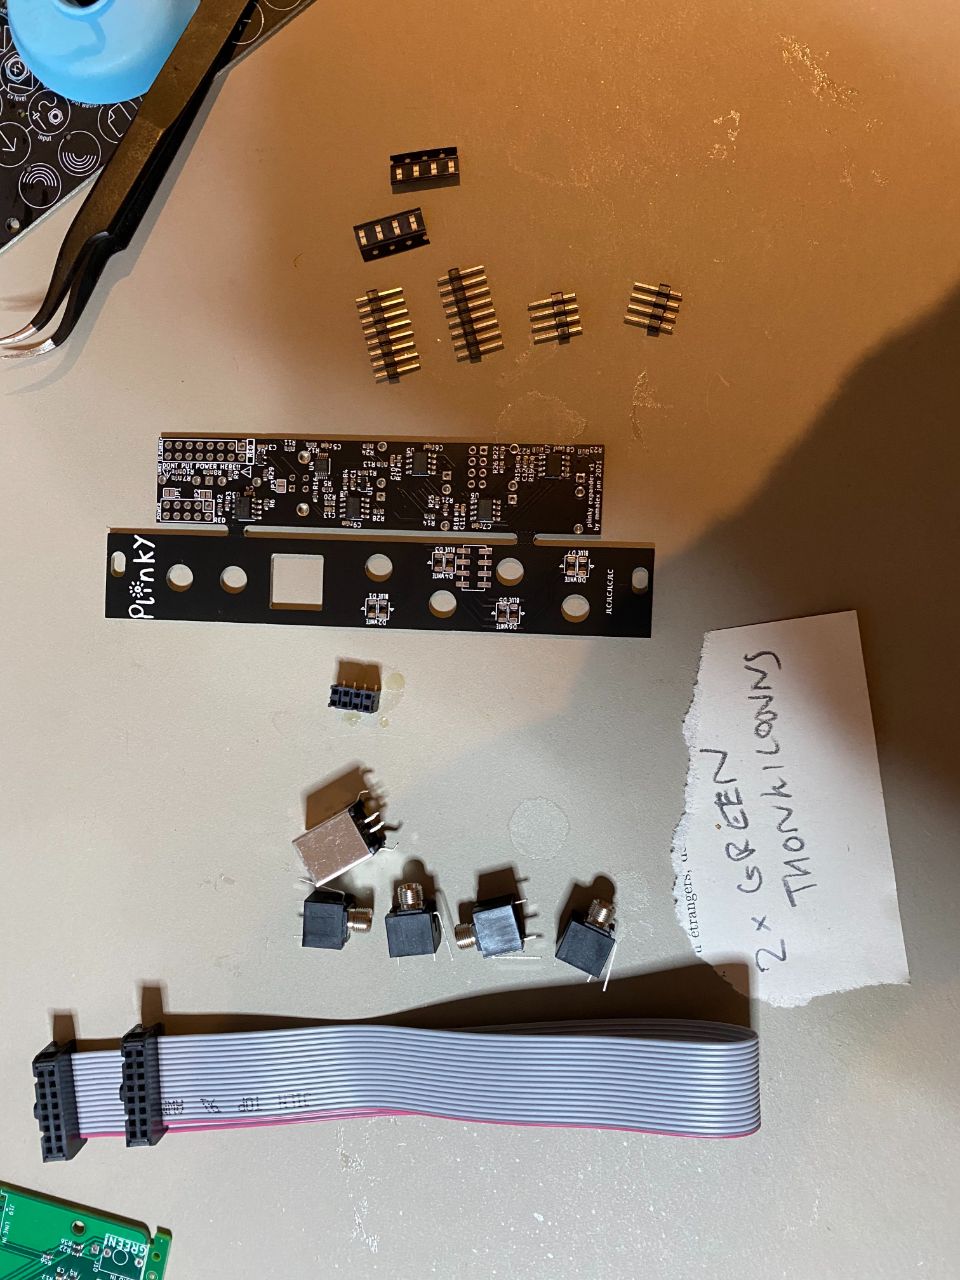
from top to bottom we have: 4 plinky white leds, 4 plinky blue leds, 8 pin and 4 pin connectors (I have long strips of 8x1 and 4x1, in theory you want 8x2 and 4x2 but separate works fine if you are just using odds and sodds from the parts drawer)
Then you have the mainboard + front panel, which arrive joined together. you have to snap them apart CAREFULLY and snip off the joiny bits, maybe sand down if you are posh.
There's a little 2x4 socket that goes on the front panel, a USB socket, 4 thonkiconns and 2 green ones (missing in the pic coz Ive run out) and the expansion cable to plinky, that is a standard 16 pin eurorack power cable BUT IT DOESNT CARY JUST POWER, ITS FOR PLINKY<->EXPANDER.
Assembly

Shove the jacks, usb and 4x2 pins into it, and solder it from the other side. You can push the little 4x2 socket upside down onto the pins to hold them neatly in place.
You want to use the face plate to hold it all in place like a sandwich, just like making plinky.
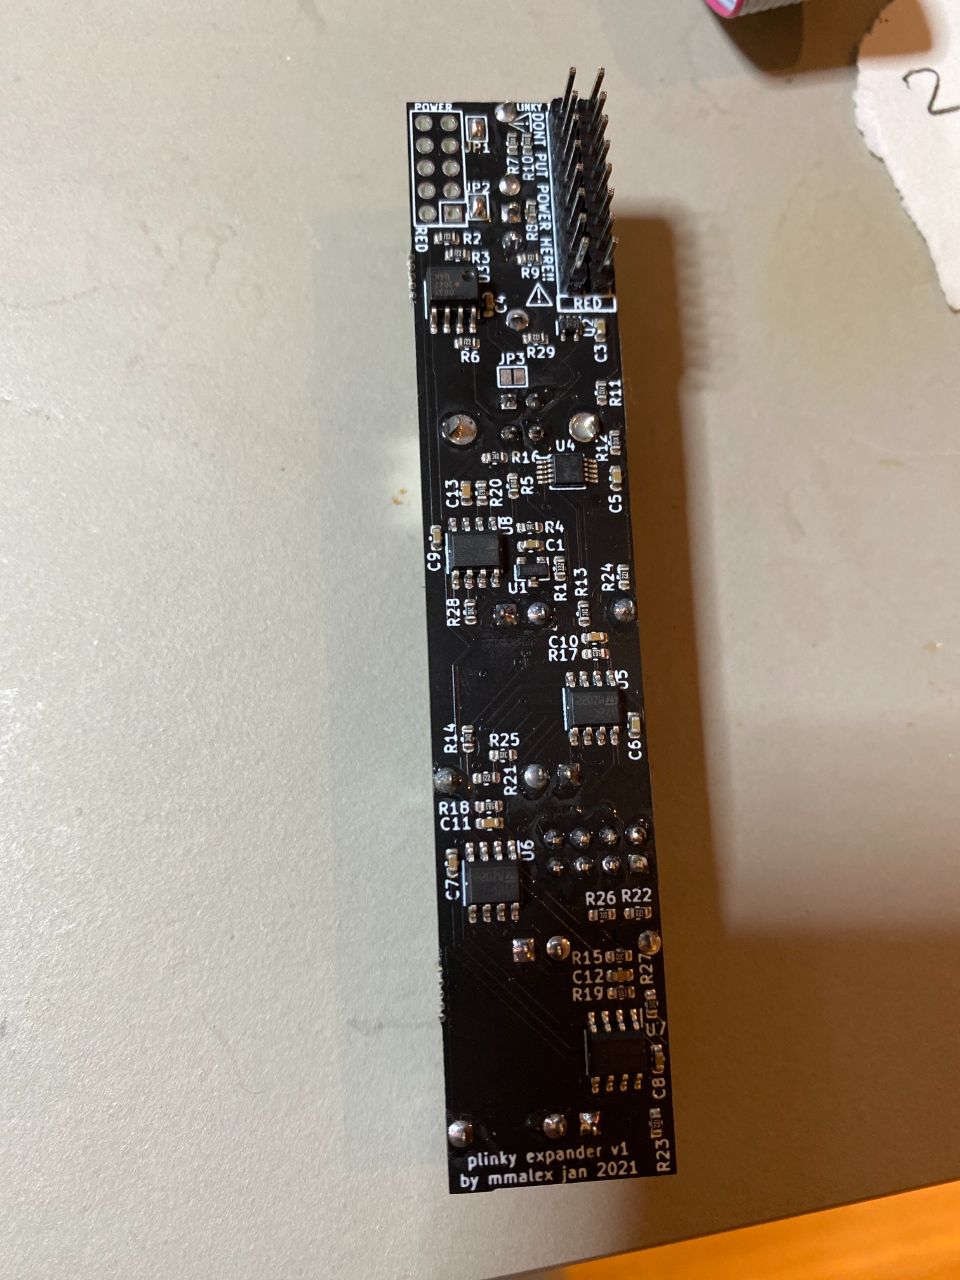
The expansion pins (8x2) go in the top corner on the other side. they're actually a bit fiddly to solder as they are right up against the green thonkiconns, but you can do it, I believe in you. you might melt your thonkiconn a bit. but hey be careful it'll be fine.
If you didnt dare mod your plinky with 2 wires, you can choose to power the expander separately, by populating the 5x2 power header top left, shown empty in the pic above. if you do that, just plug the expander into your euro power bus like it was a module with a normal 10 pin plug/cable.
However I recommend powering it via the plinky, in which case there is no need to populate the 5x2 power header top left. instead, blob solder over JP1 and JP2 to bridge them together. if you look carefully in the picture above, top left, you can see JP1 and JP2 have been blobbed over. good job!
All that remains in the build is the front panel!
Slap the 8 leds in - 4 white, 4 blue, as indicated by the silkscreen on the front panel:
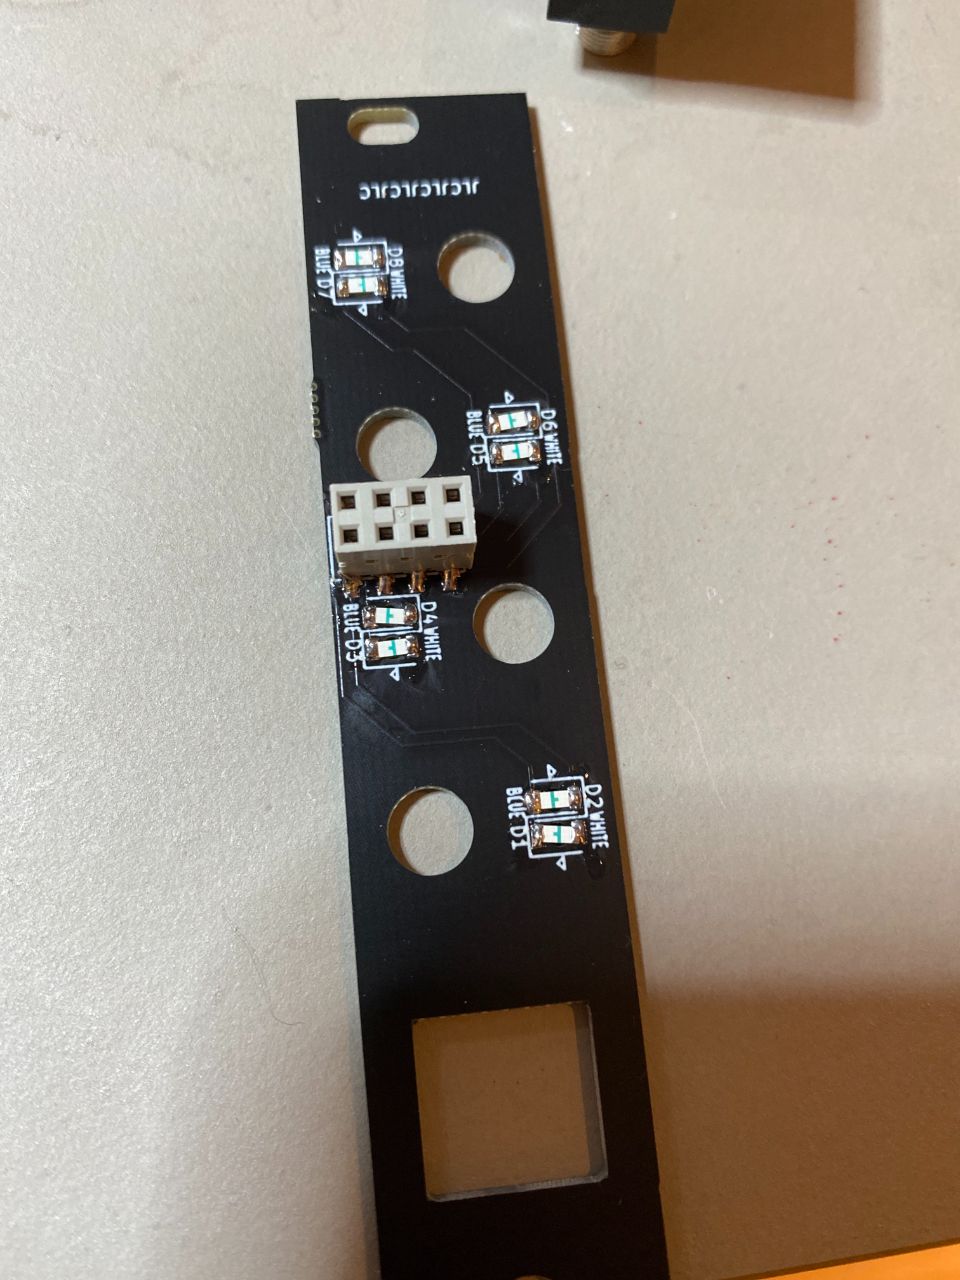
Be sure to get the LEDs the right way round. the silk screen is correct. The soldering process is covered in the main plinky build guide.
To line up the little 4x2 socket, I find it helpful to plonk it onto the main board upside down, then put the sandwich back together, and awkwardly solder as many of its legs as you can while sandwiched, just like plinky. then take the sanwich off again to solder any remaining legs.
Mine came up slightly offset from the pads, which might be a bug in the gerbers, I'll have to check. but its such a small offset it doesnt matter, you can just solder it - it doesnt even look too messy (see image above).
Plug it all together, comme ca:
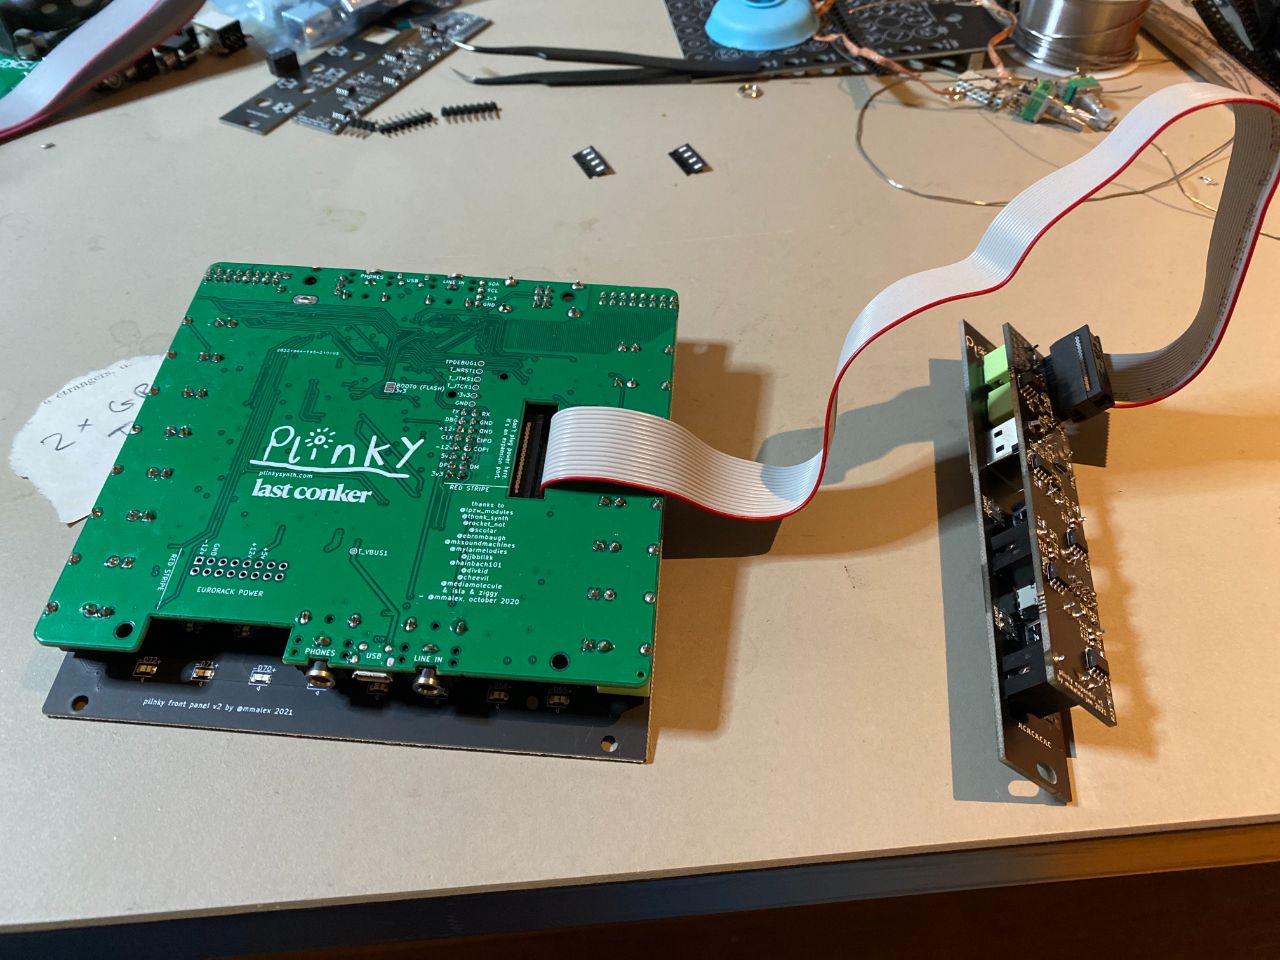
Plinky should just work when you plug it in. midi in will work just like usb midi!
Safety Instructions
In Compliance with GPSR EU Regulation 2023/988, find the Safety Instructions here.