Browser-based Patch Editor
Plinky has a a browser-based patch editor at plinkysynth.github.io/editor. You will need a Web-Serial enabled browser like Google Chrome to run it, and allow it to connect with Plinky.
Here's how to use the editor.
- Connect Plinky to your Computer using a USB cable
- Open Chrome, and navigate to plinkysynth.github.io/editor
- The page reads "Current state: disconnected".
- Click the Connect button.
- A popup will appear and prompt you to select a MIDI device. Select "Plinky MIDI Synth" and click connect.
If do not see Plinky listed here, try another USB cable.
Note that some USB cables are charge-only and do not transmit data.
On Linux, you will need to grant hardware access to Plinky.
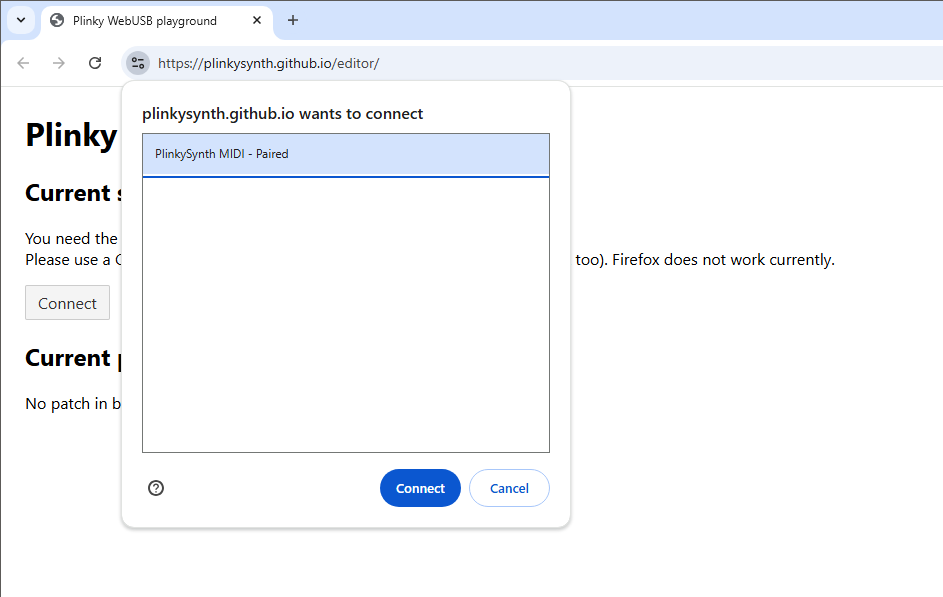
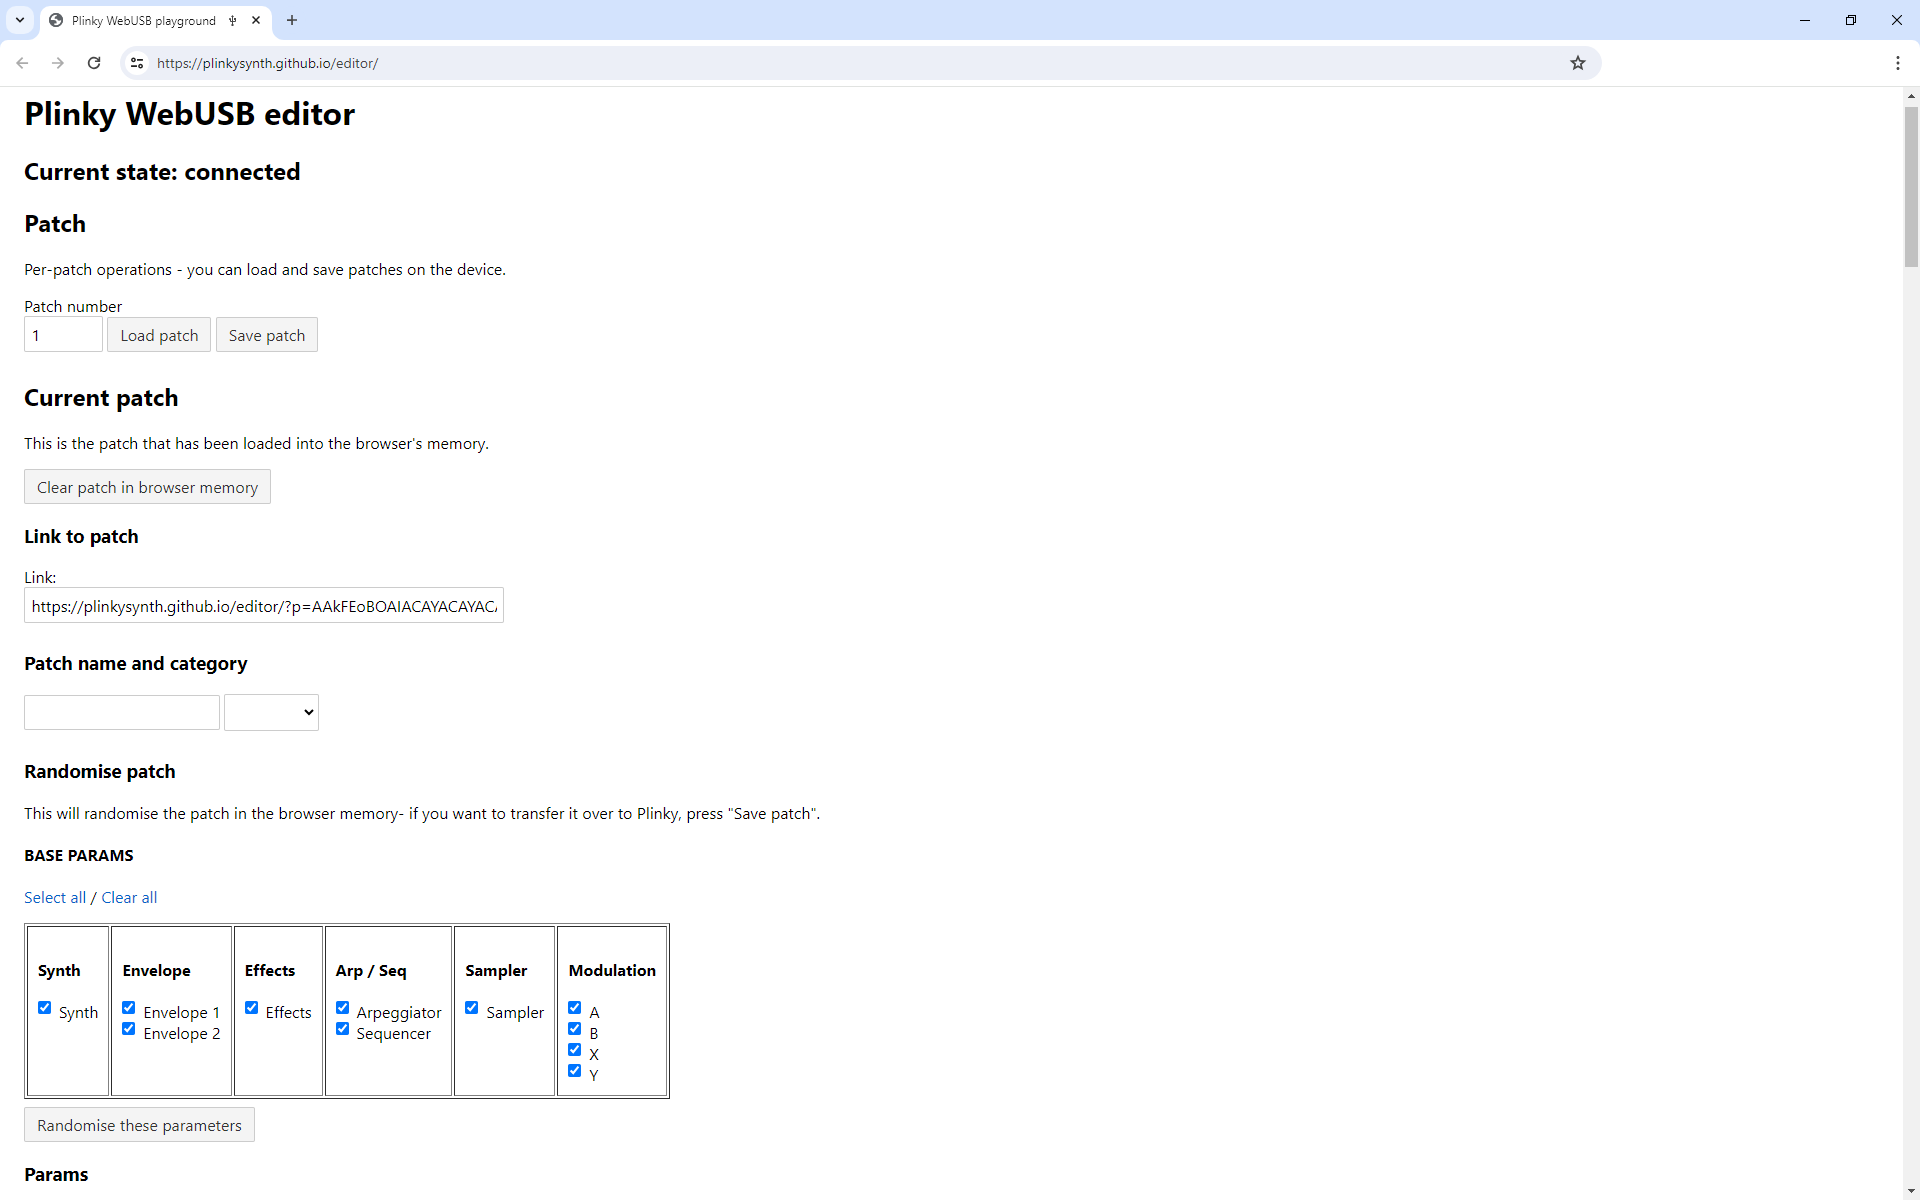
The page should change to read "Current state: connected" at the top.
- Under Current Patch, the page will say "No patch in browser memory"
- Enter the patch number you want to edit.
- This should ideally be the same preset you have selected on Plinky, unless you plan to copy a preset into another slot.
- Click Load Patch. This downloads the settings to the browser.
- You will see the page fill with the parameters of the patch.
You may need to scroll down to see a list of all the parameters.
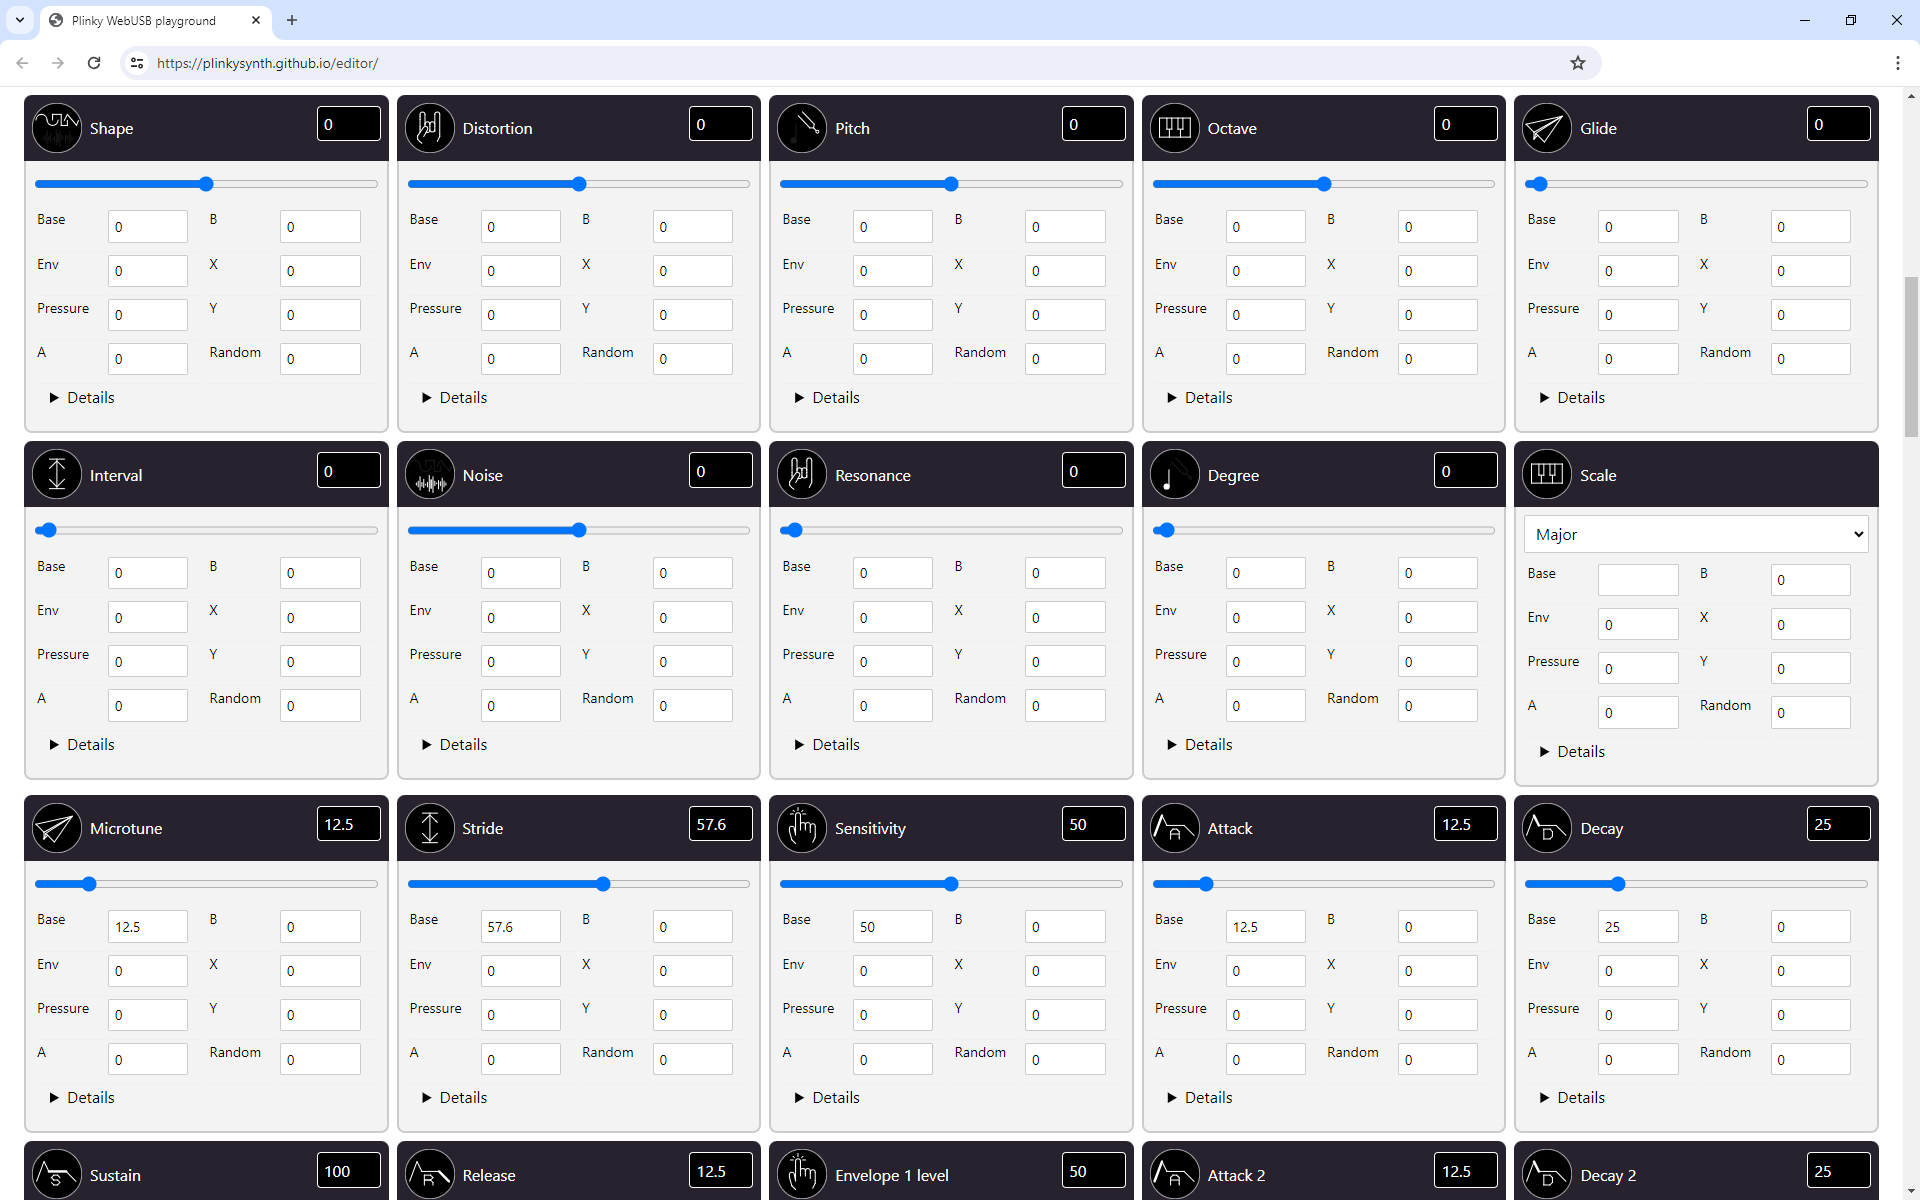
For each Parameter, you can change these parameters:
- use the Slider to set the base value for the parameter.
- Env sets the amount the envelope will modulate this parameter
- Pressure sets how much pressure will influence this parameter
- A, B, X, Y determine the modulation from the A, B knobs and A, B, X, Y Control voltage
- Random: enter a number to set how much this parameter is randomized each time you play a note
Click the Details arrow to expand a detailed description for this Parameter.
Once you are done editing the parameters, scroll back up.
- Under Patch name and category, you can set a patch name, and a descriptive (or silly) category.
- Click Save patch. This upload the settings to Plinky.
Important: the values you edit do not update in real time. You have to click Save Patch in order upload the settings to Plinky and hear your changes.
If you want to edit a subset of parameters in real time, use the TouchOSC editor.
Under Link to Patch, you will find the complete Patch encoded in a link. Copy this Link and save it in a text file if you want to archive your preset. Note that this saves the synthesis parameters, but not the sampled material.
Browser-based patch editor (Linux)
When trying to connect to the browser-based patch editor using Linux, if you get a message like
SecurityError: Failed to execute 'open' on 'USBDevice': Access denied. you may need to grant hardware access to Plinky. This can be done by adding an udev rule.
First, ensure that the Plinky is connected to your computer via USB.
You can check if the Plinky is connected by running:
lsusbYou should see a line similar to:
Bus 001 Device 026: ID cafe:4018 Plinky PlinkySynth MIDINote the cafe id. If this is not showing up, you may need to check your USB cable.
Next, add yourself to the plugdev group. You can do this by running:
sudo usermod -a -G plugdev $USERYou will need to log out and log back in for the group membership to take effect.
To check if you are in the plugdev group, you can run:
groupsThis should show a list of groups you are in, and plugdev should be one of them.
Next, you need to create a udev rule to allow access to the Plinky.
You can use nano or any other editor of your choice:
sudo nano /etc/udev/rules.d/99-plinky.rulesThe file should have the following line:
SUBSYSTEM=="usb", ATTRS{idVendor}=="cafe", MODE="0660", GROUP="plugdev"This grants read access to the Plinky to the plugdev group.
Then, reload the udev rules:
sudo udevadm control --reload-rulesFinally, unplug and replug the Plinky, and you should be able to connect to the editor.
Thank you to users ddmm64 and ch-one for submitting this solution.
TouchOSC Editor
Steven Okyeron / Denki Oto has created a TouchOSC template for Plinky.
It allows you to edit a subset of Plinkys parameters via MIDI in realtime, using Plinky's MIDI implementation.
Here's how to use it:
- Install TouchOSC from hexler.net/touchosc.
- In this guide we use version 1.3.5.212 on Windows 10.
- Download the template file for Plinky: plinky_control_v1.2.tosc
- Connect Plinky to your Computer via USB
Now open TouchOSC and load the template file via File > Open.
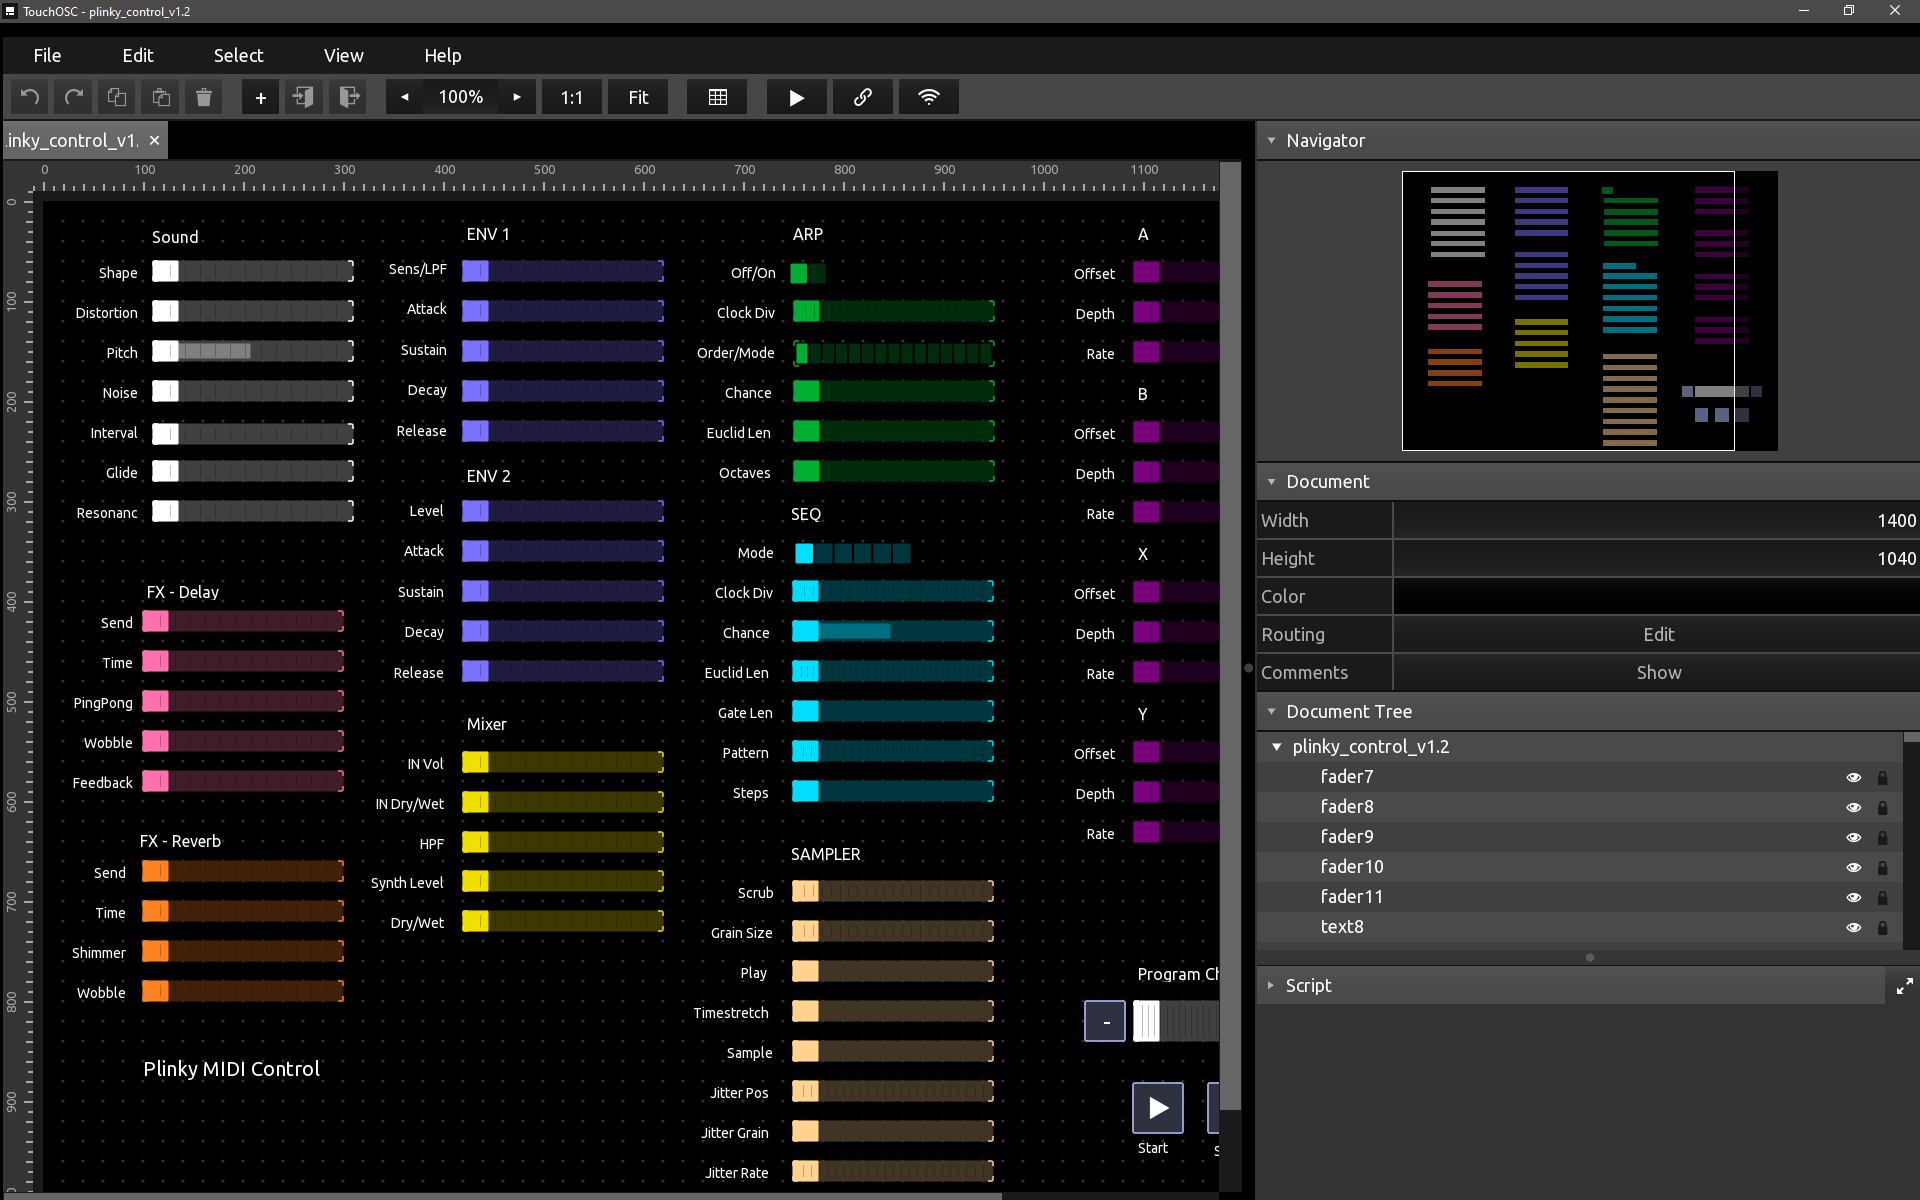
Next, make sure Plinky is found as a MIDI device.
- Go to Edit > Preferences
- Under Inputs and Outputs, set a checkmark next to PlinkySynth MIDI
If do not see Plinky listed here, try another USB cable.
Note that some USB cables are charge-only and do not transmit data.
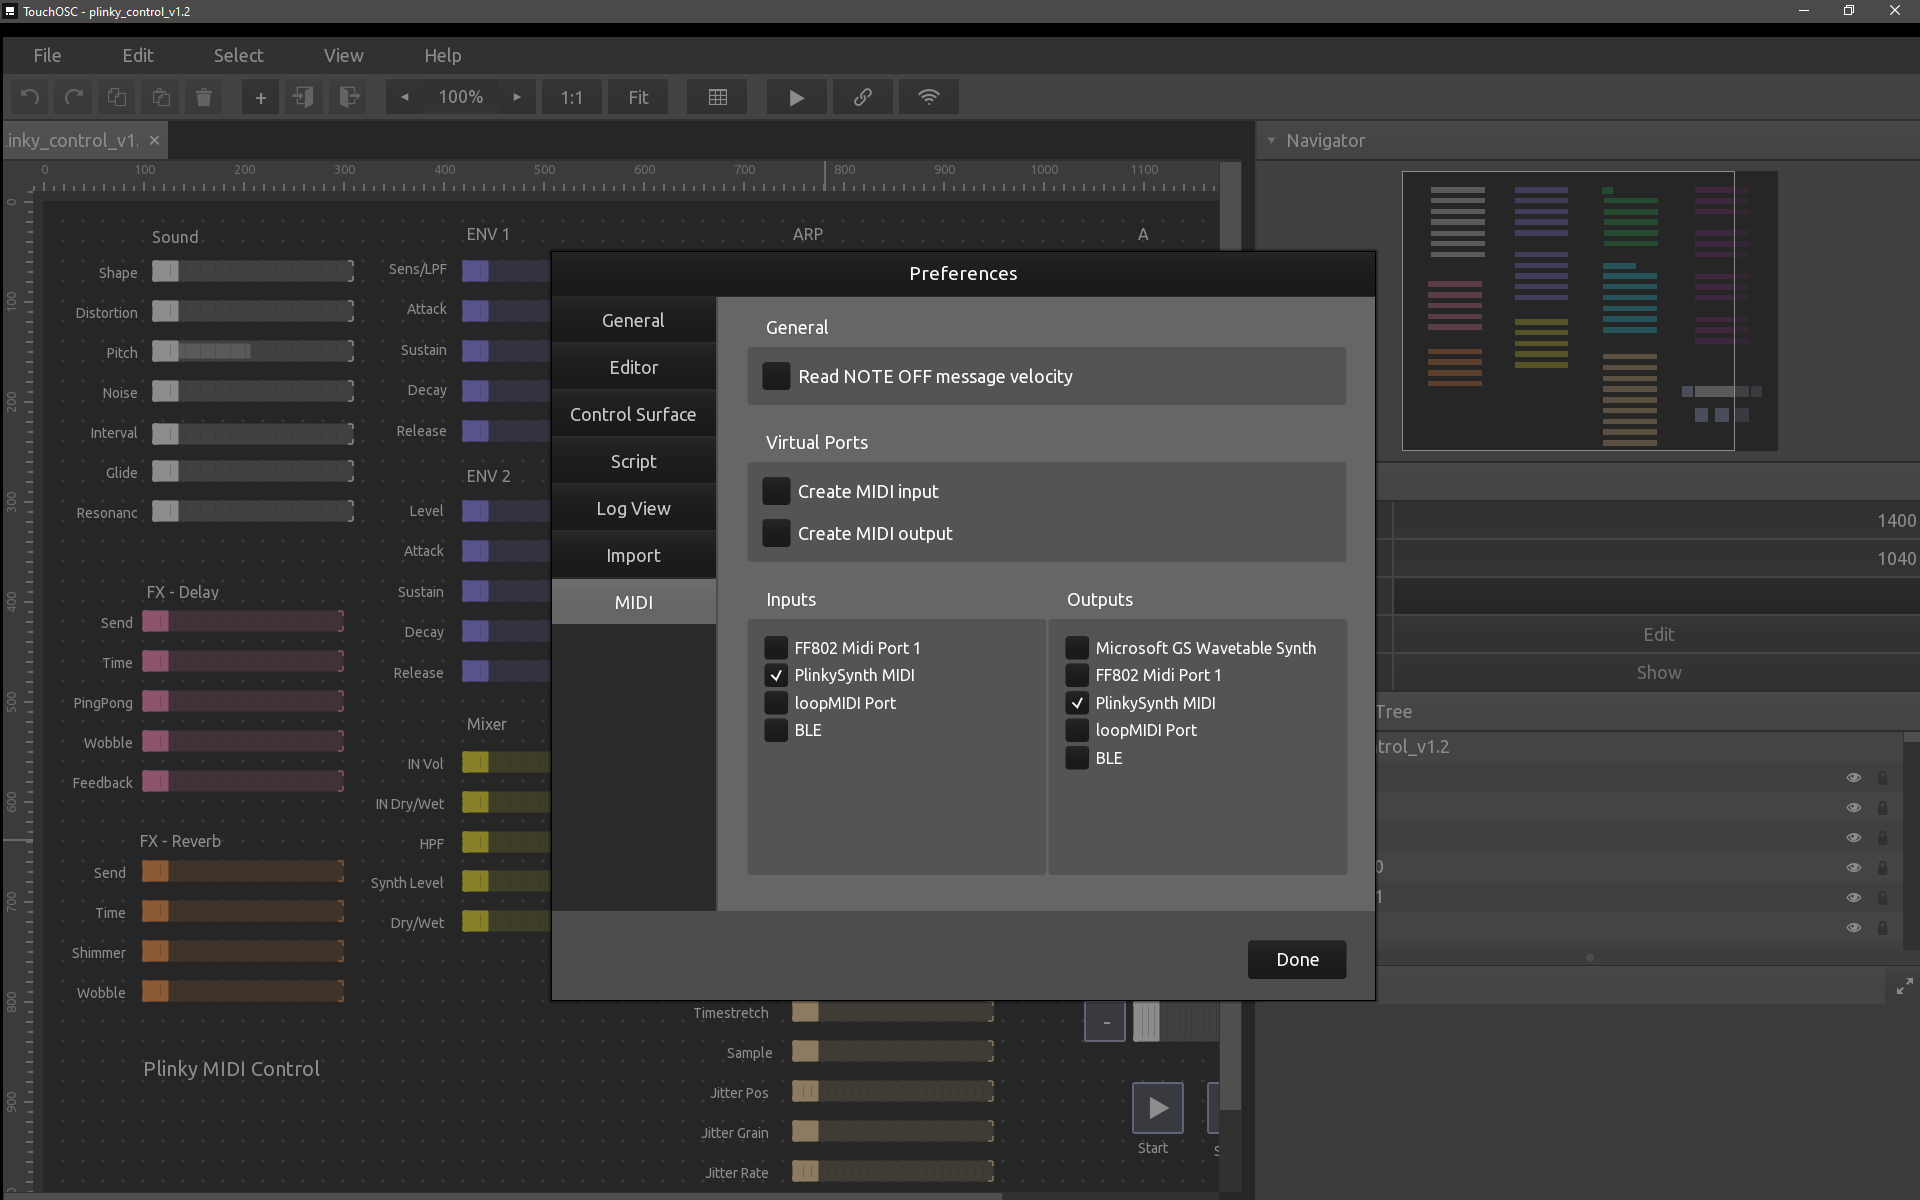
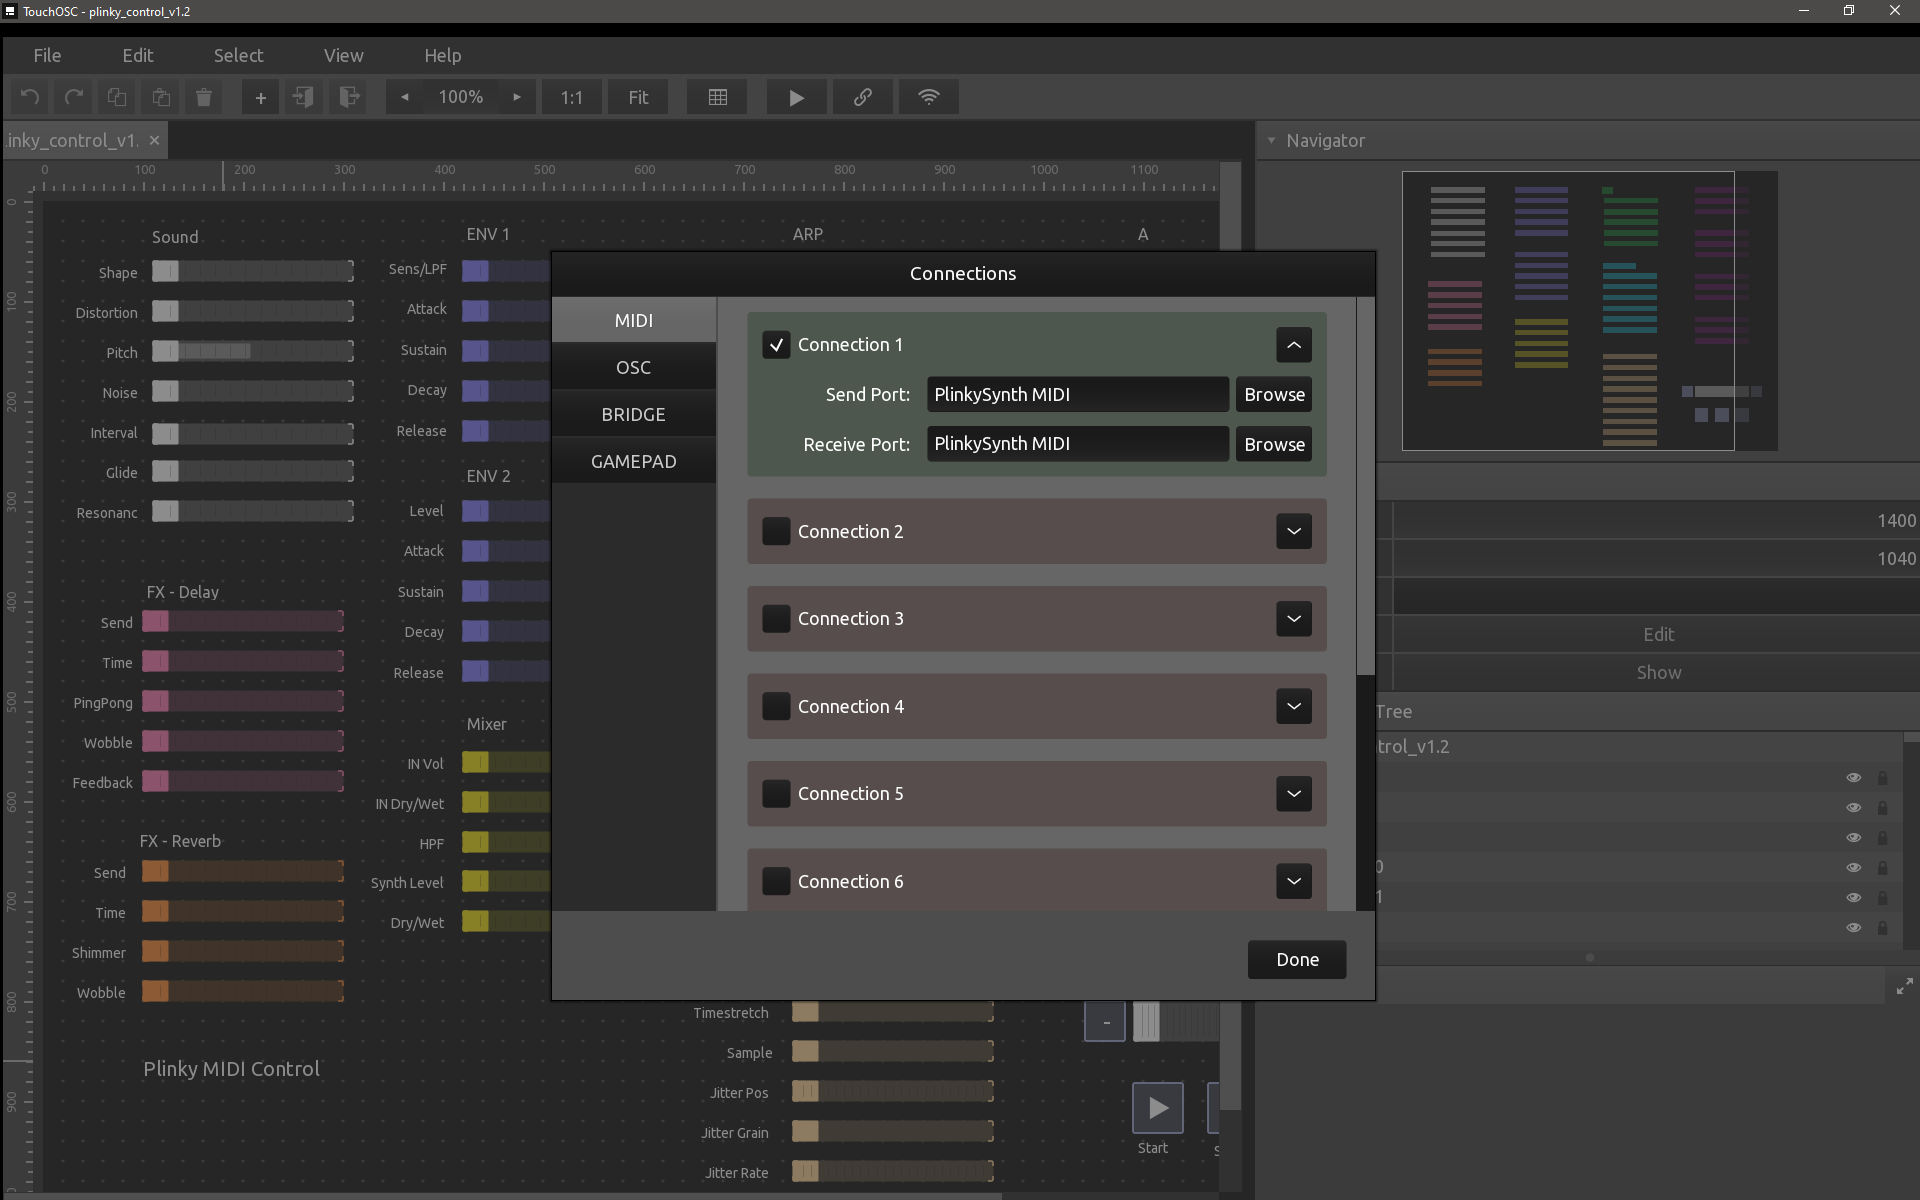
Then, you need to tell TouchOSC you want to send the MIDI from this template to Plinky.
- Go to Edit > Connections
- Check Connection 1
- For Send Port and Receive Port click Browse, then select PlinkySynth MIDI
Save your settings by clicking Done.
To launch the template, click the Play button.
Use the sliders to set Plinkys parameters in realtime, via MIDI.
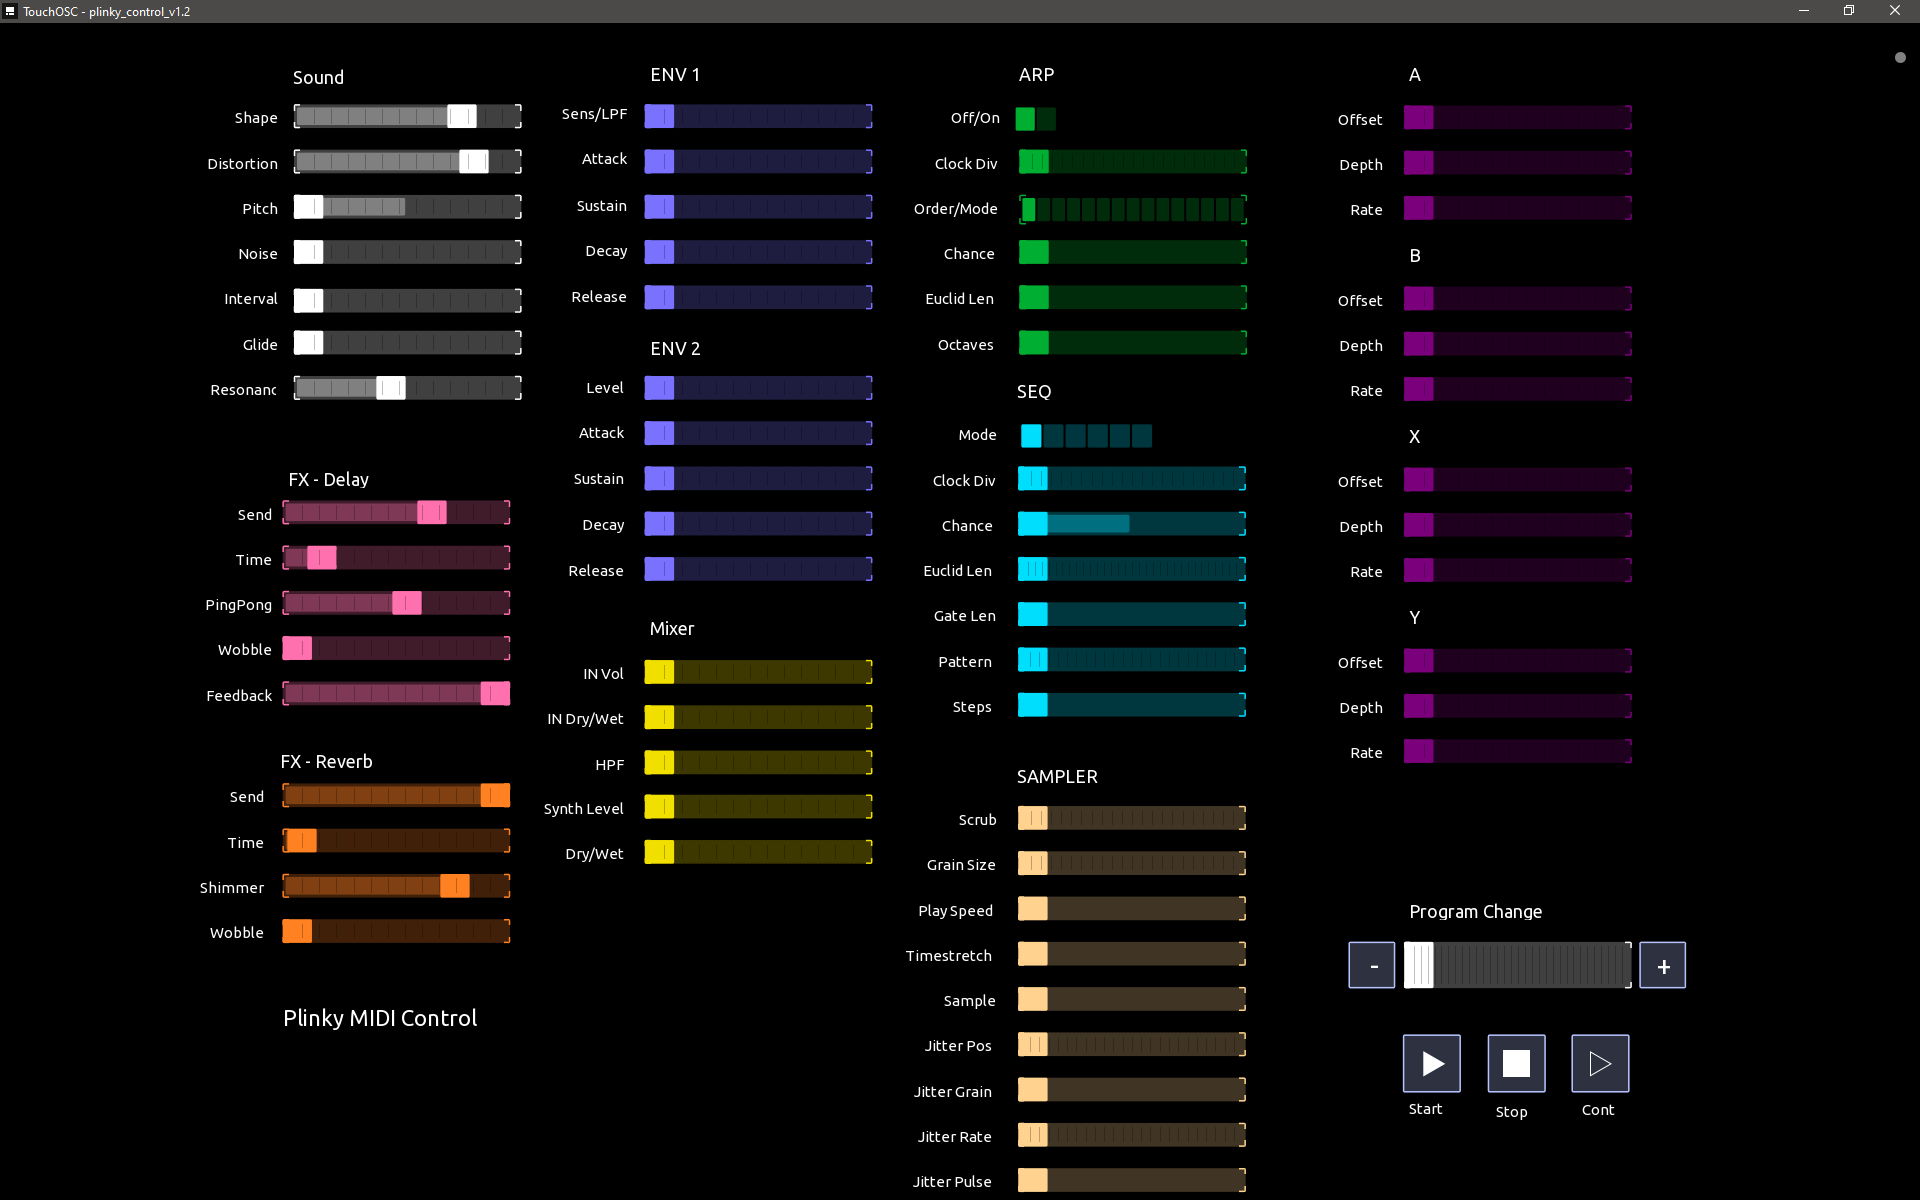
While this example is written for the desktop app, TouchOSC runs on Android and iOS as well. You should be able to connect Plinky via an OTG USB cable and be able to control Plinky in a similar fashion.
Max for Live Editor
Luca Spagnoletti / PixFoil has contributed a Max for Live Editor for Plinky.
Luca is an electronic musician and composer. Check out his work here: Atlante - OOPArt - C H O N (Compilation)
It allows you to edit a subset of Plinkys parameters via MIDI in realtime, using Plinky's MIDI implementation. To run the patch, you need an installation of Ableton Live (11 or newer) with a Max for Live license.
Follow these steps to setup the editor:
- Connect Plinky to your computer via USB
- Download the editor file for Plinky: Plinky_Editor_1.0.amxd
- Open Ableton Live
- Right click the User Library
- Select Show in Explorer (Windows) or Show in Finder (Mac)
- Create a Folder Editors and a subfolder Plinky Editor
- Place the .amxd file in it
The Editor should now be visible in Live under User Library > Editors > Plinky Editor > Plinky_Editor_1.0
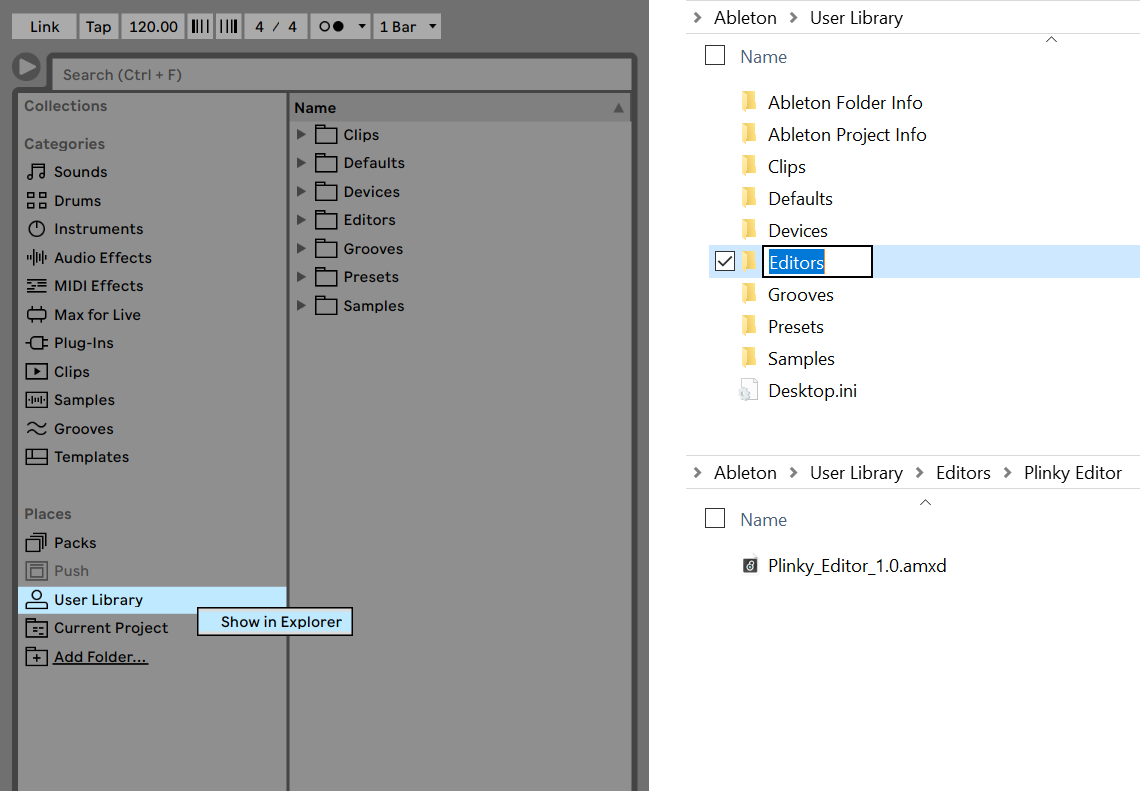
Now we need to set up the MIDI connection.
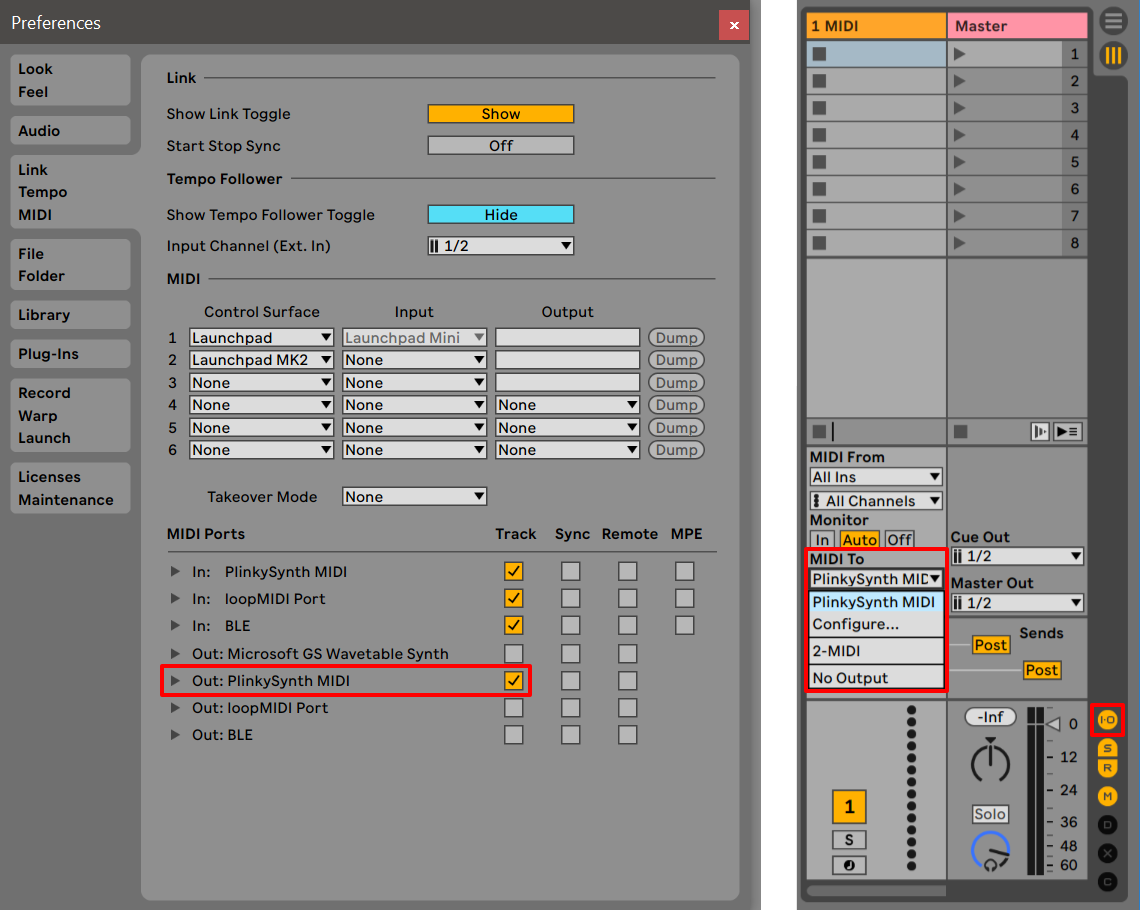
- In Live, go to Options > Preferences
- Navigate to the Link Tempo MIDI tab
- Under MIDI Ports, you should see Out: PlinkySynth MIDI. Set a checkmark for Track.
If do not see Plinky listed here, try another USB cable.
Note that some USB cables are charge-only and do not transmit data.
We have enabled MIDI output to Plinky. Now we need to route a MIDI Track to it.
- In this example we use Track 1 MIDI from an empty Live Set.
- Or, to create a new one, go to Create > Insert MIDI Track
- Make sure the I/O section for Tracks is visible.
- If it isn't, go to View > In/Out and set the checkmark.
- From the MIDI To dropdown, select PlinkySynth MIDI.
Let's drop the Editor onto the track.
- Go to User Library > Editors > Plinky Editor
- Drag and drop Plinky_Editor_1.0.amxd into Track 1 MIDI
- Click Open to display the user interface
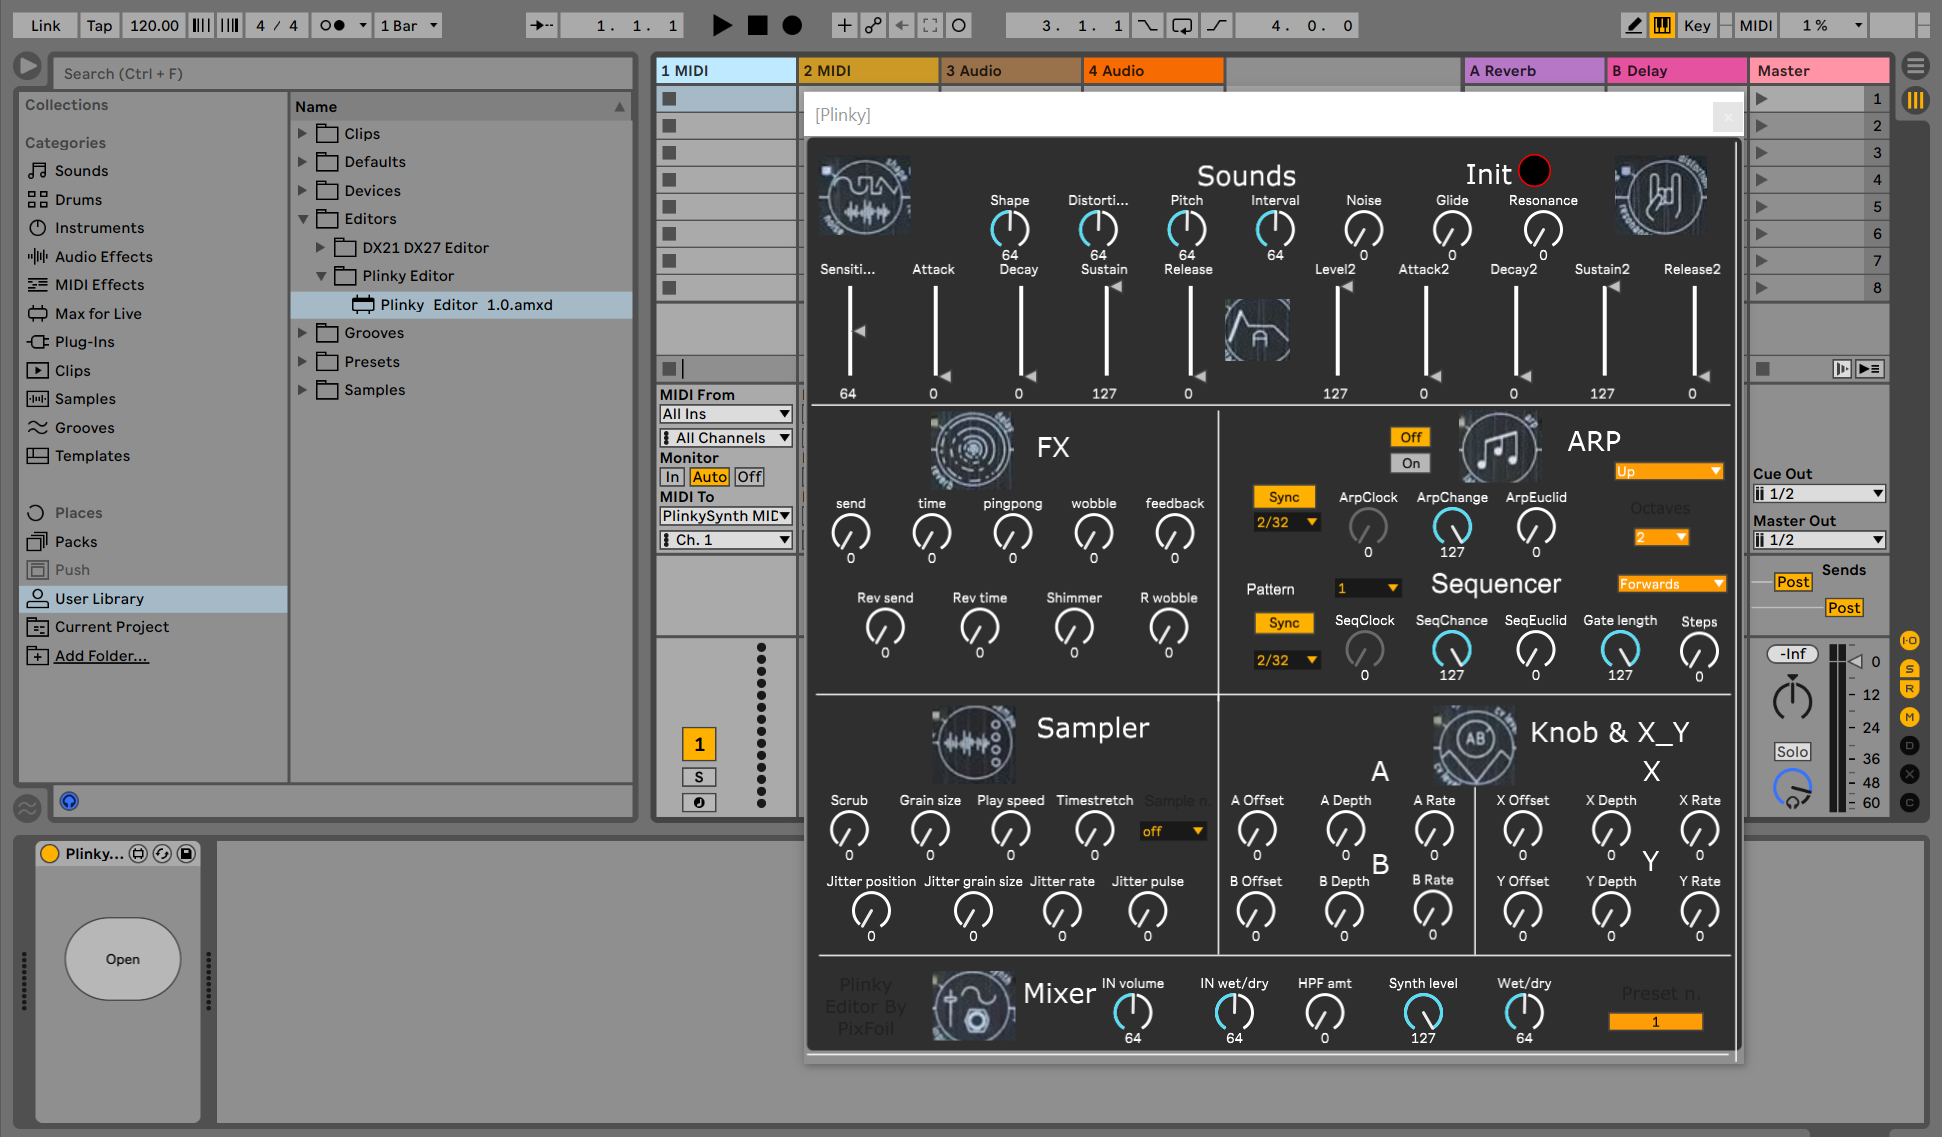
Now you can use the rotary knobs and sliders to set Plinkys parameters in realtime, via MIDI.
Note that this editor also integrates with Ableton Push 2 and 3 controllers.
OXI, Droid, Pyramid, Hapax
Benjamin Fox has contributed a full list of Plinky / Plinky+ MIDI CCs & NRPNs to midi.guide.
You can download the list as CSV and as compatible files for a number of great controllers:
- Plinky template for OXI One,
- Plinky template for the Droid modules
- Plinky template for Squarp Instruments Pyramid
- Plinky template for Squarp Instruments Hapax .
Thank you Benjamin for creating these files.
Cirklon
Zifor has made a collection of MIDI Control Change (CC) mapping files (.cki format) for the Sequentix Cirklon hardware sequencer. You can find the files on the Ziforge GitHub repo.
The instrument definitions enable parameter automation from the Cirklon across the Plinky and Plinky+ synthesis engine.
Thank you Zifor for creating these files.
